After 10 years of shooting, editing and grading I decided that color correction should have been my main job.
During all these years I attended online and in presence courses with pro colorsists to be sure to become a pro myself.
I mainly use DaVinci resolve with a surface control and 10 bit calibrated monitors. I'm based in Italy but used to travel for job.
Ehilà Luca,
questo l'aggiornamento di oggi.
Anzitutto il mirror tool funziona magnificamente e questo ci permette, a costo zero, di avere il doppio delle variazioni (anche se magari non così significative). Non sono riuscito a far funzionare un "button" nell'interfaccia del controller (mi dirai come associare lo scrit da eseguire), per cui ho messo un integer 0/1:
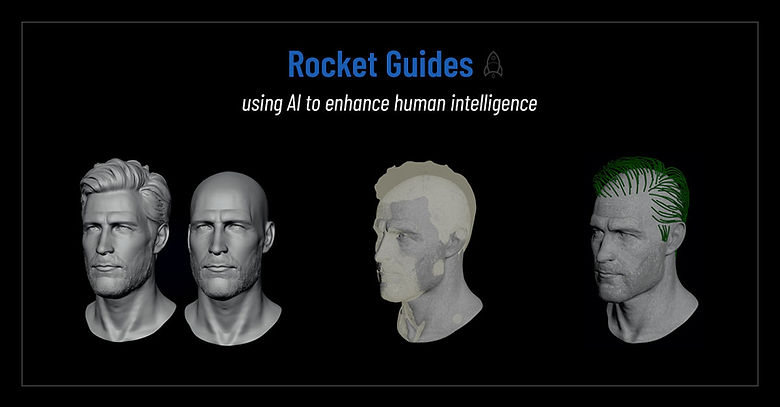
INTRODUCTION
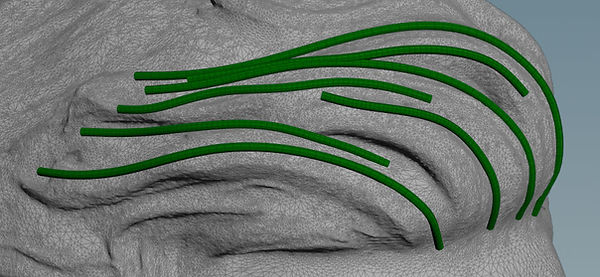
Sculpting guides can sometimes be very difficult and time-consuming, especially when you don’t have enough references. The bottleneck is that when we use orthographic views, you are essentially sculpting on a 2D plane. For this reason, you need front, side, top, and back views so you can adjust your guides accordingly.
What if you could draw your guides directly in 3D?
To better follow the tutorial, you can download the hda and the sample scene:
By using this menu, you can quicly move accross the different sections:
MENU
INSTALLATION
Unzip the file and put the content of the HDA directory in your otls dir: (../Documents/houdini21.0/otls)
THE WORKFLOW
More than a tool, what I’m presenting is a workflow that leverages the AI tools available today to speed up our work.
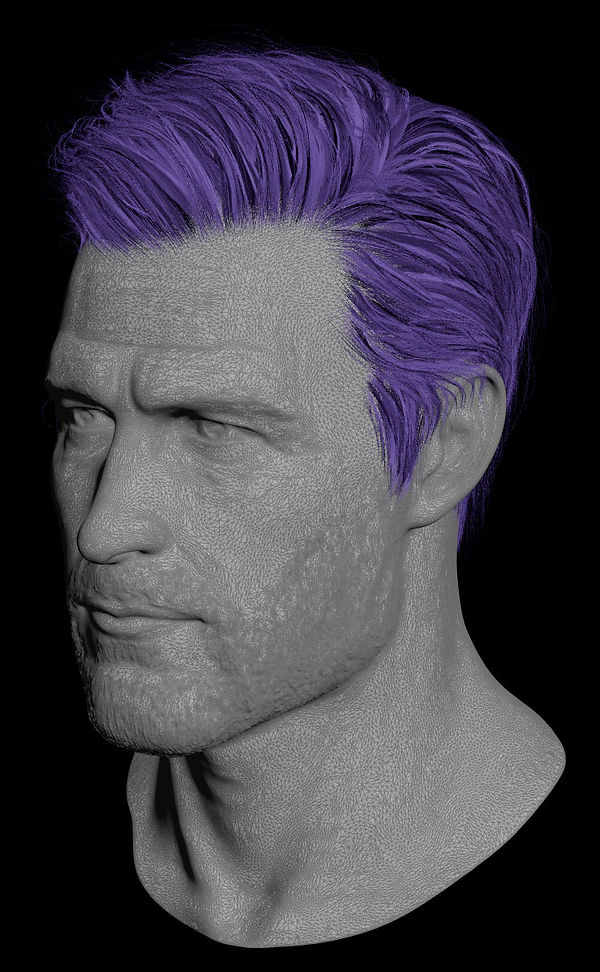
Working for many studios, I often struggle with the lack of references. They simply give me a front photo of the hairstyle and ask me to imagine how the rest should look. And that’s where the bottleneck begins: first, I have to search for additional references, and then I have to sculpt while constantly going back and forth between the different views.
What if I had a 3D model of my grooming without asking the modeling team to spend time creating it?
AI TOOLS
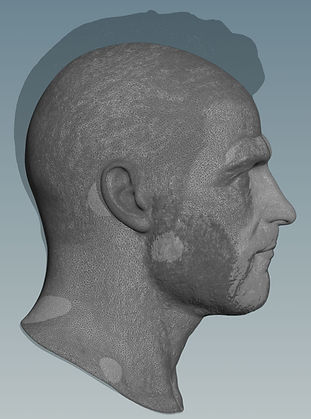
Meshy is a platform that can help you get the job done. Using just one reference, it can generate the model you need. However, to use my tool (or rather, this workflow) you need two versions of the same character: one bald and one with hair.
Obviously, you can use any other AI tool that does the same, but Meshy is very simple to use, fast, and the subscription is affordable.
THE PROCESS
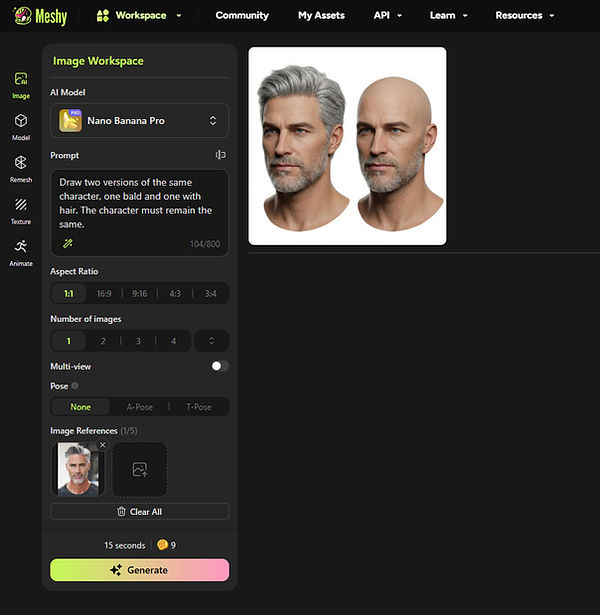
First of all, you need to create the 2D versions of the bald and the hair character.
In the AI Image section, upload the reference image and write a prompt like this:
“Draw two versions of the same character, one bald and one with hair. The character must remain the same.”
Once you have the image, upload it to the modeling section and generate the meshes:
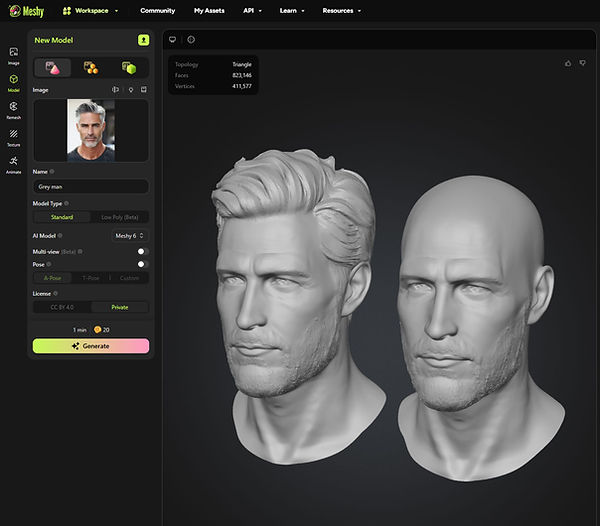
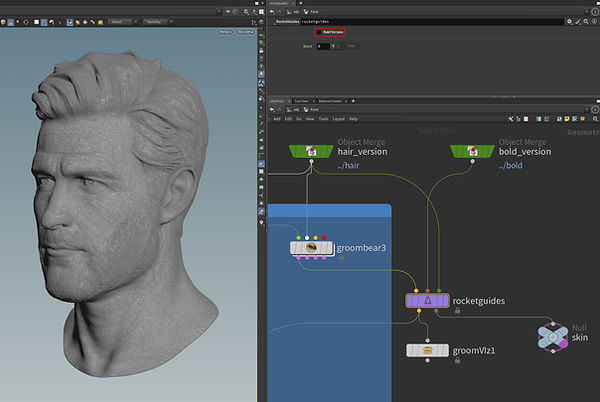
Now it’s time to set up the scene in Houdini. Import the model, separate the hair and bald versions using Blast or Split nodes, and use a Transform SOP to match their positions.
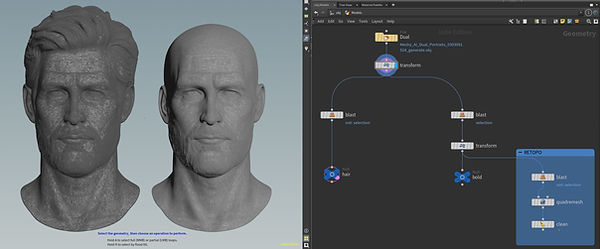
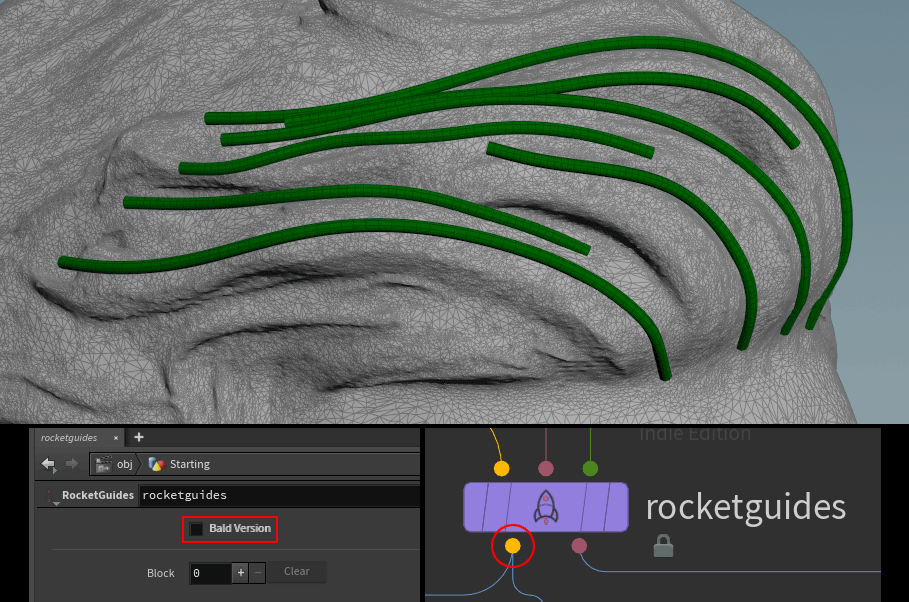
We are now ready to feed the Rocket Guides tool:

INPUTS
A
Guide Groom node. I'm using Groom Bear, but you can use the vanilla grooming tool.
B
Bold version
C
Hair version
OUTPUTS
D
Guides
E
Skin
We are now ready to start drawing the guides.
Select the Rocket Guides, and uncheck "Bald Version."
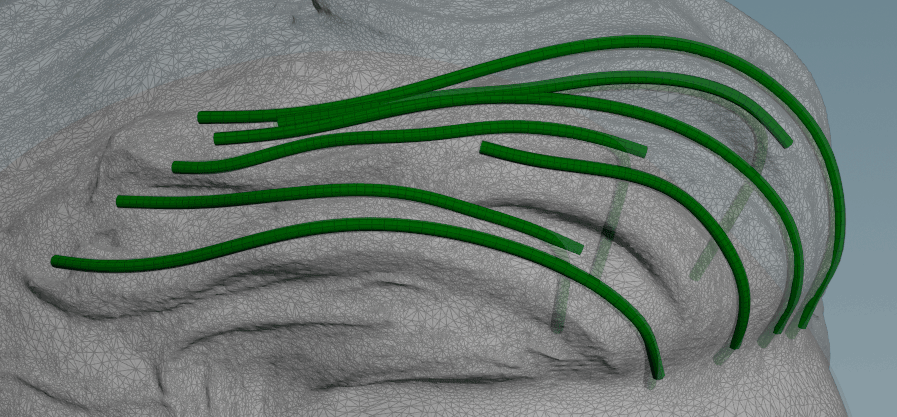
In your guide groom tool, enable the draw on skin option. By doing this, your guides will snap perfectly to the proxy hair surface:
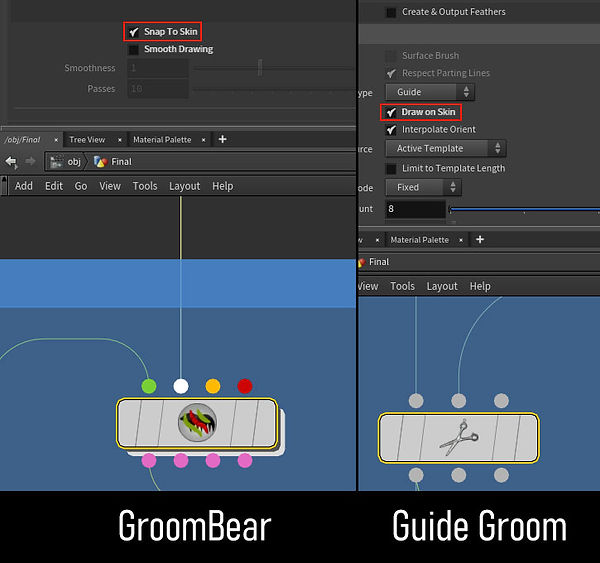
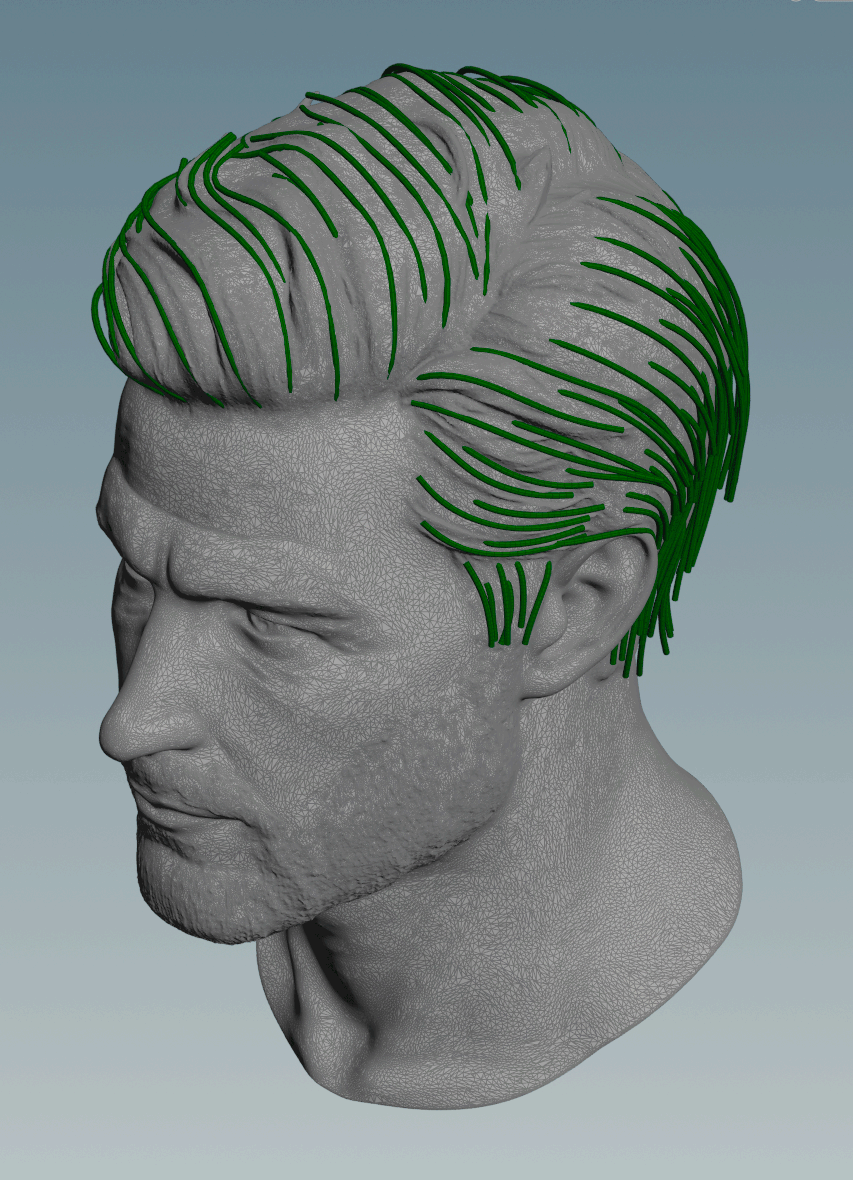
The fun part starts here. With this setup, you can draw all your guides very quickly in a single pass, with no need to jump between orthographic views.
Now, if you switch between the bald and the hair version and visualize the output guides (first yellow dot), you can see how the root of each guide sticks to the scalp:
Now, connect a Guide Groom node to the guide output of Rocket Guides (yellow dot). This will allow you to adjust the curves.
The first step should be smoothing the first part of the curve to avoid compenetrations in this area
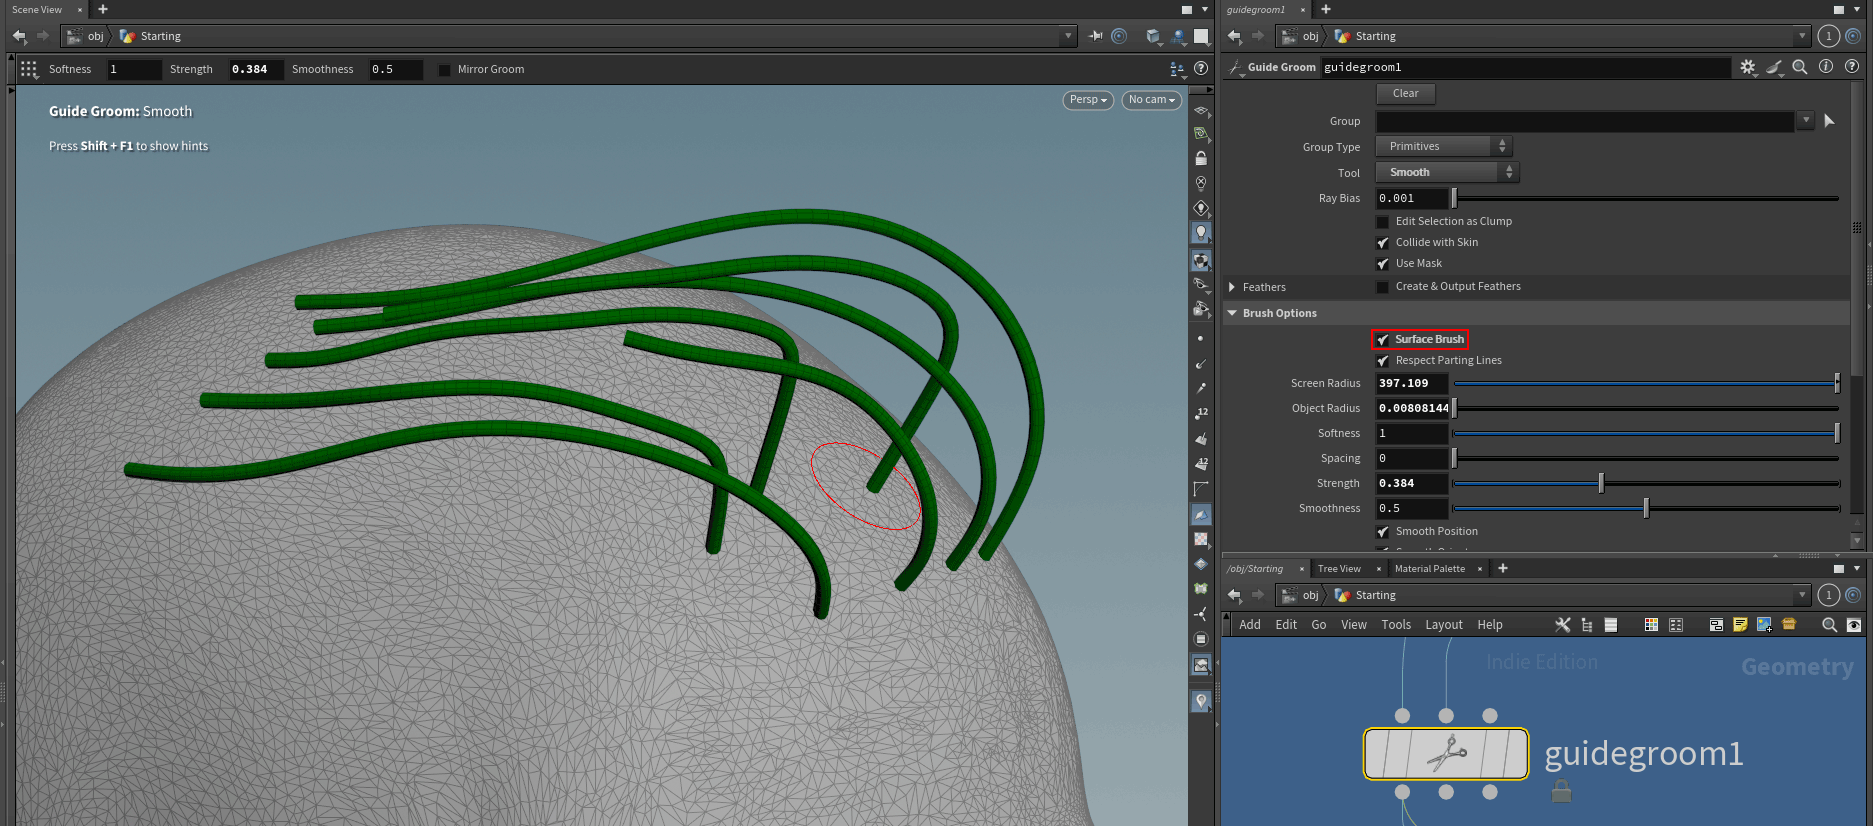
At this point, it is crucial to use this trick.
Since you have modified your guides using a Guide Groom node, which is not procedural, there will be a difference between these guides and the ones coming from the output of Rocket Guides.
Because of this, if you need to add or draw new guides, you will lose your modifications when the curves are recached.
Watch this video:
IMPORTANT NOTE
For the loop, if you are not using Groom Bear, please watch this video to avoid an infinite recursion error.
Keep going until you finish placing all the guides.
HEAT GEODESIC
What?
"Measures the distance of each point to a group of source points along a polygonal surface".
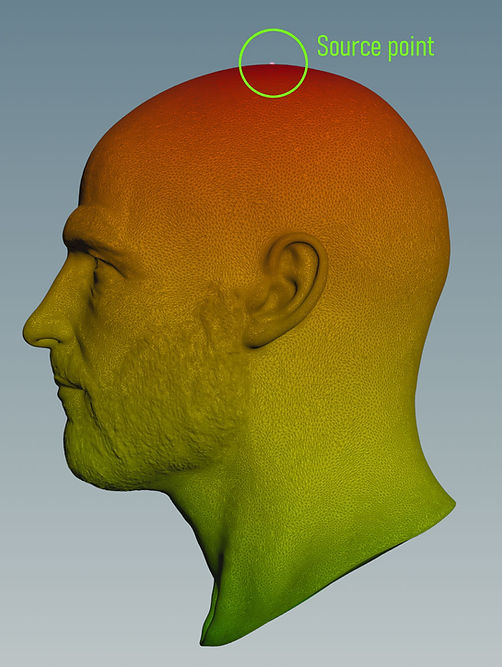
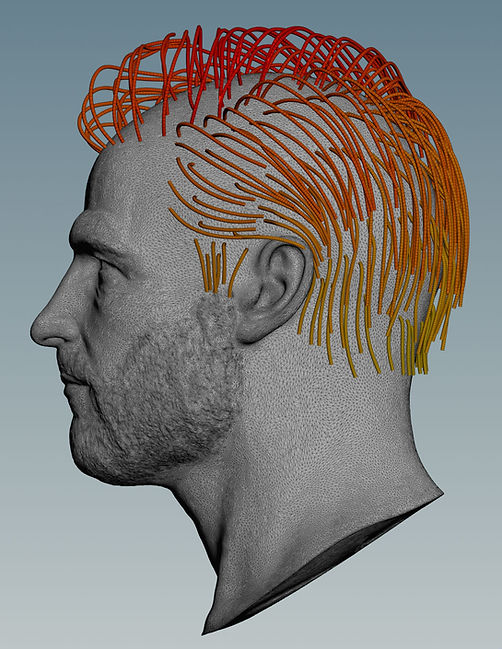
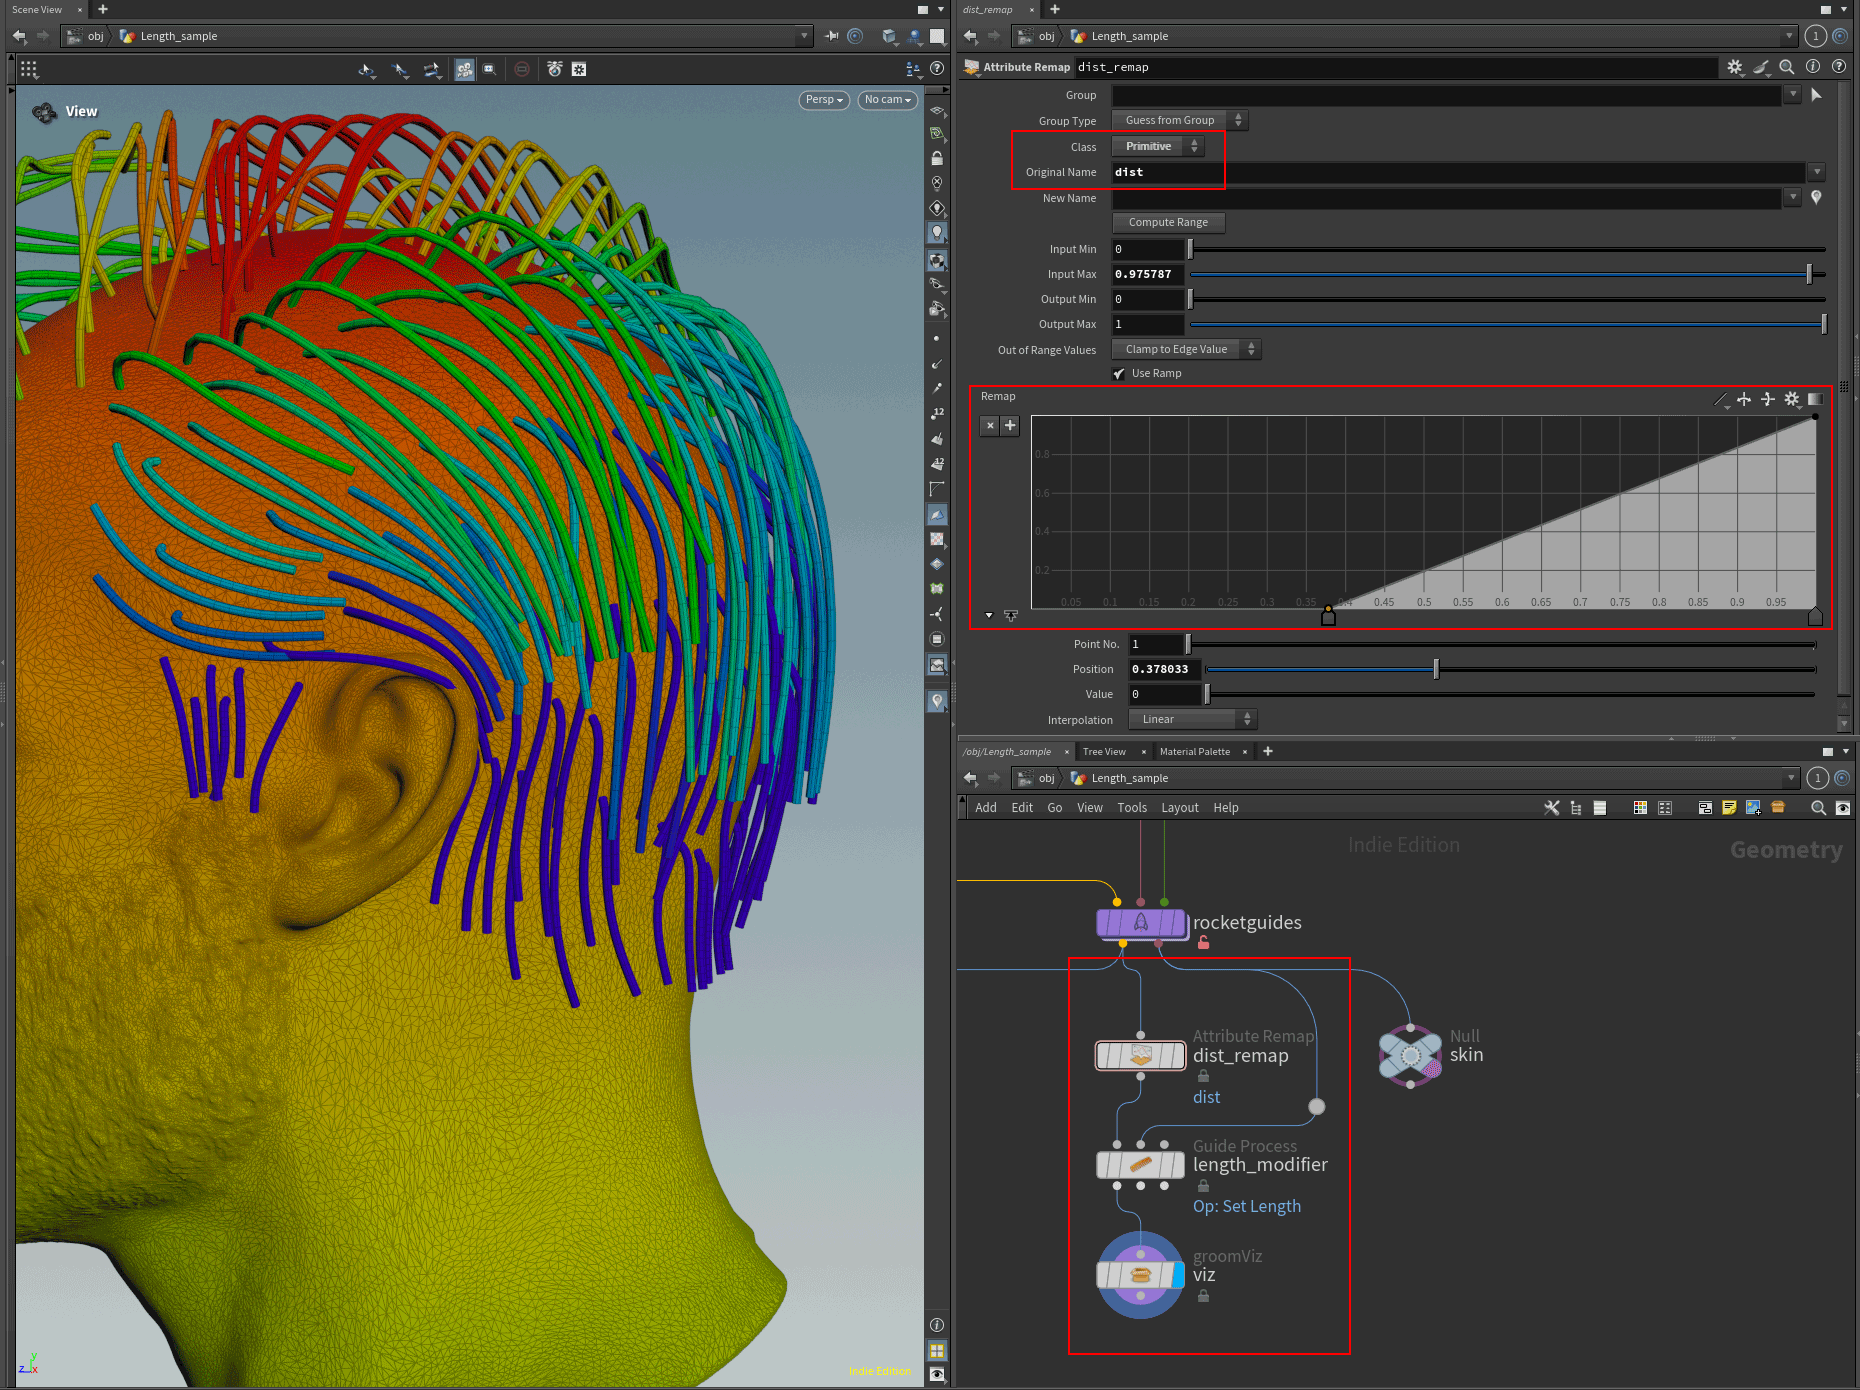
Inside Rocket Guides, there is a Geodesic node that sets the reference point to the highest point of the mesh. This creates a point attribute called “dist,” visualized as a heat map going from top (maximum value) to bottom (minimum value).
By promoting the attribute from points to primitives, I transfer it to the guides.
How can you use it? Let me show you.
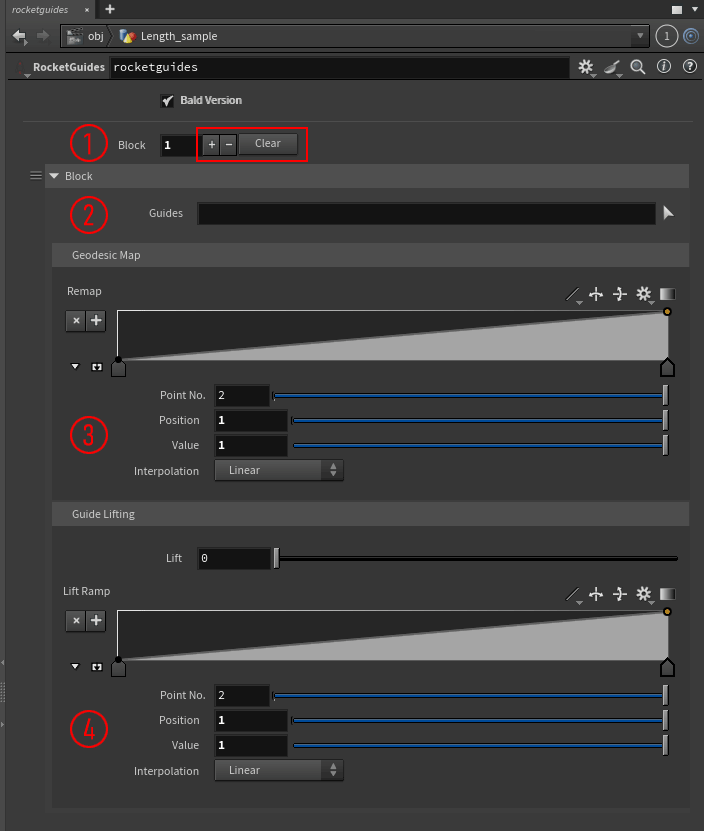
In the Rocket Guides UI, there is a section where you can create multiple blocks to control groups of guides using a built-in lift modifier.
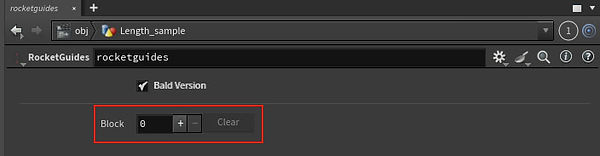
Simply press the “+” button to create the first block:
1
Use the “+” button to create a block, “–” to delete it, or “Clear” to remove all blocks at once.
2
Here, by clicking the arrow, you can select the guides you want to modify
3
Use this ramp to adjust the minimum and maximum values of the “dist” attribute.
4
With the Lift slider, you set the value, and with the ramp, you control the effect along the guide, from root to tip.
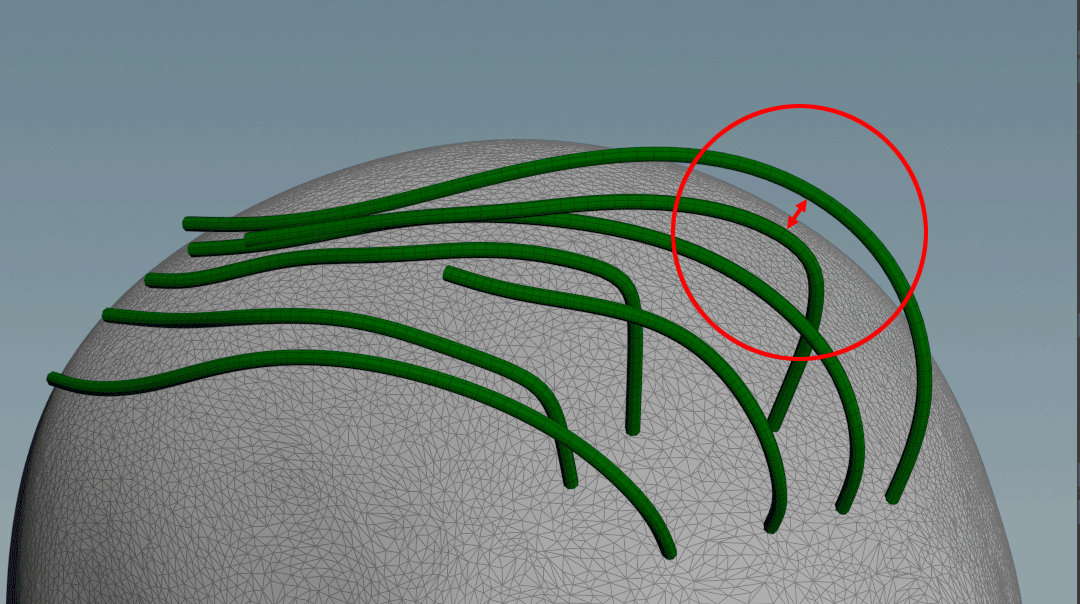
In the following example, I correct the intersecting guides (green guides inside the white rectangle) by lifting them using the geodesic ramp. This allows me to create a different effect in the top-to-bottom direction, and use the lift ramp to control different strengths from root to tip.
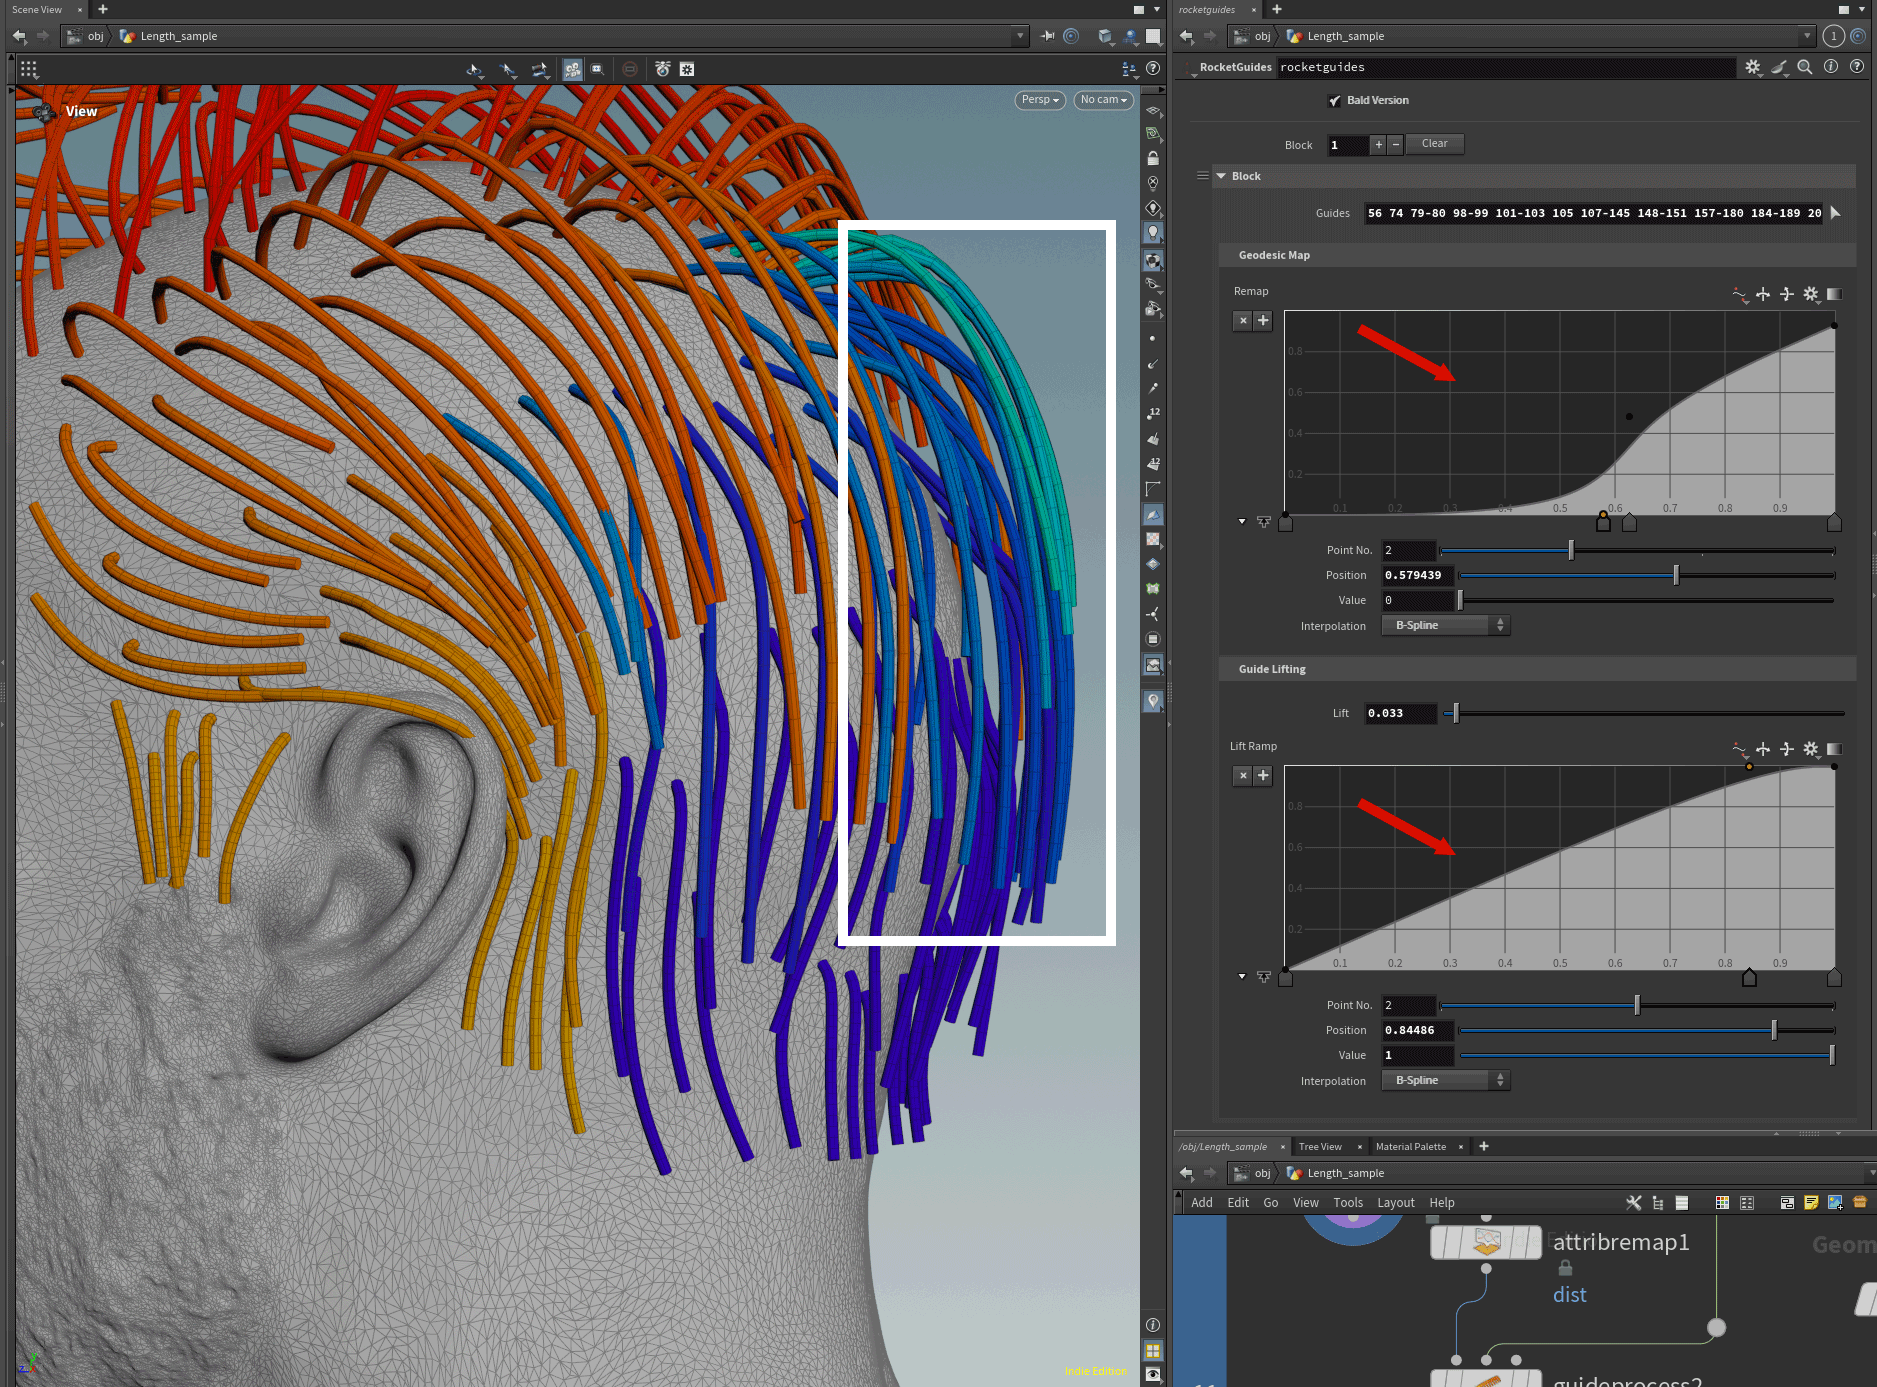
Watch this video for a live example:
You can also use this attribute to control other modifiers. Without painting a map, you can control the length, for example, or the noise.
In this case, you need to use a small hack and connect your modifiers to the guide output of Rocket Guides.
Now, by adding my Rocket Grooming (download the tool here), you can quickly finish your grooming.
What did I tell you? Grooming at the speed of light :)
Enjoy, and remember: share the knowledge!