After 10 years of shooting, editing and grading I decided that color correction should have been my main job.
During all these years I attended online and in presence courses with pro colorsists to be sure to become a pro myself.
I mainly use DaVinci resolve with a surface control and 10 bit calibrated monitors. I'm based in Italy but used to travel for job.
Ehilà Luca,
questo l'aggiornamento di oggi.
Anzitutto il mirror tool funziona magnificamente e questo ci permette, a costo zero, di avere il doppio delle variazioni (anche se magari non così significative). Non sono riuscito a far funzionare un "button" nell'interfaccia del controller (mi dirai come associare lo scrit da eseguire), per cui ho messo un integer 0/1:
ROCKET INTERPOLATE

INTRODUCTION
In production, the most important thing is being able to make changes to your grooming quickly, without destroying your work. This requires planning ahead and keeping your setup clean and organized.
A large number of guides gives you very precise control, but when it’s time to reshape the groom, things can quickly turn into a nightmare.
No worries, Rocket Interpolate is here!
VIDEO
For those who want a Rocket rundown of the tool
OVERVIEW
I built this tool for the latest cinematic I worked on. The goal was to cover the entire scalp with guides using only a small number of them, while keeping everything fully procedural.
The result is a new HDA that, like the other members of the Rocket family, lives in a single node and is simple, clean, and artist-friendly.

INSTALLATION
Download the HDA and place it in the otls directory inside Houdini/Documents.
This tool has been developed and tested on version 21.
INPUTS AND OUTPUTS
Very simple. Plug your guides into the first input and the skin into the second one. The outputs are identical to the inputs, guides and skin in, guides and skin out.

SETTINGS
Divided into blocks, Rocket Interpolate is a modular HDA. This means you can apply different settings to different groups of guides.
It's divided into two sections:
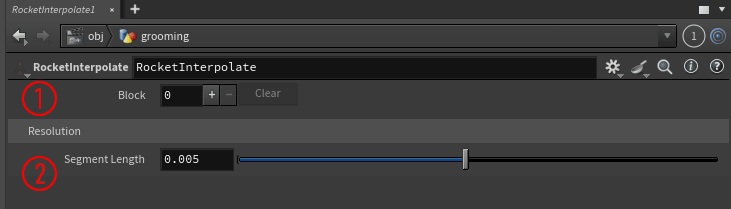
1. Block
Here, you decide how many blocks to create. It’s best not to add more than 4 or 5 blocks to keep everything fast and responsive. If you need more control, add another HDA and split the groom into additional parts.
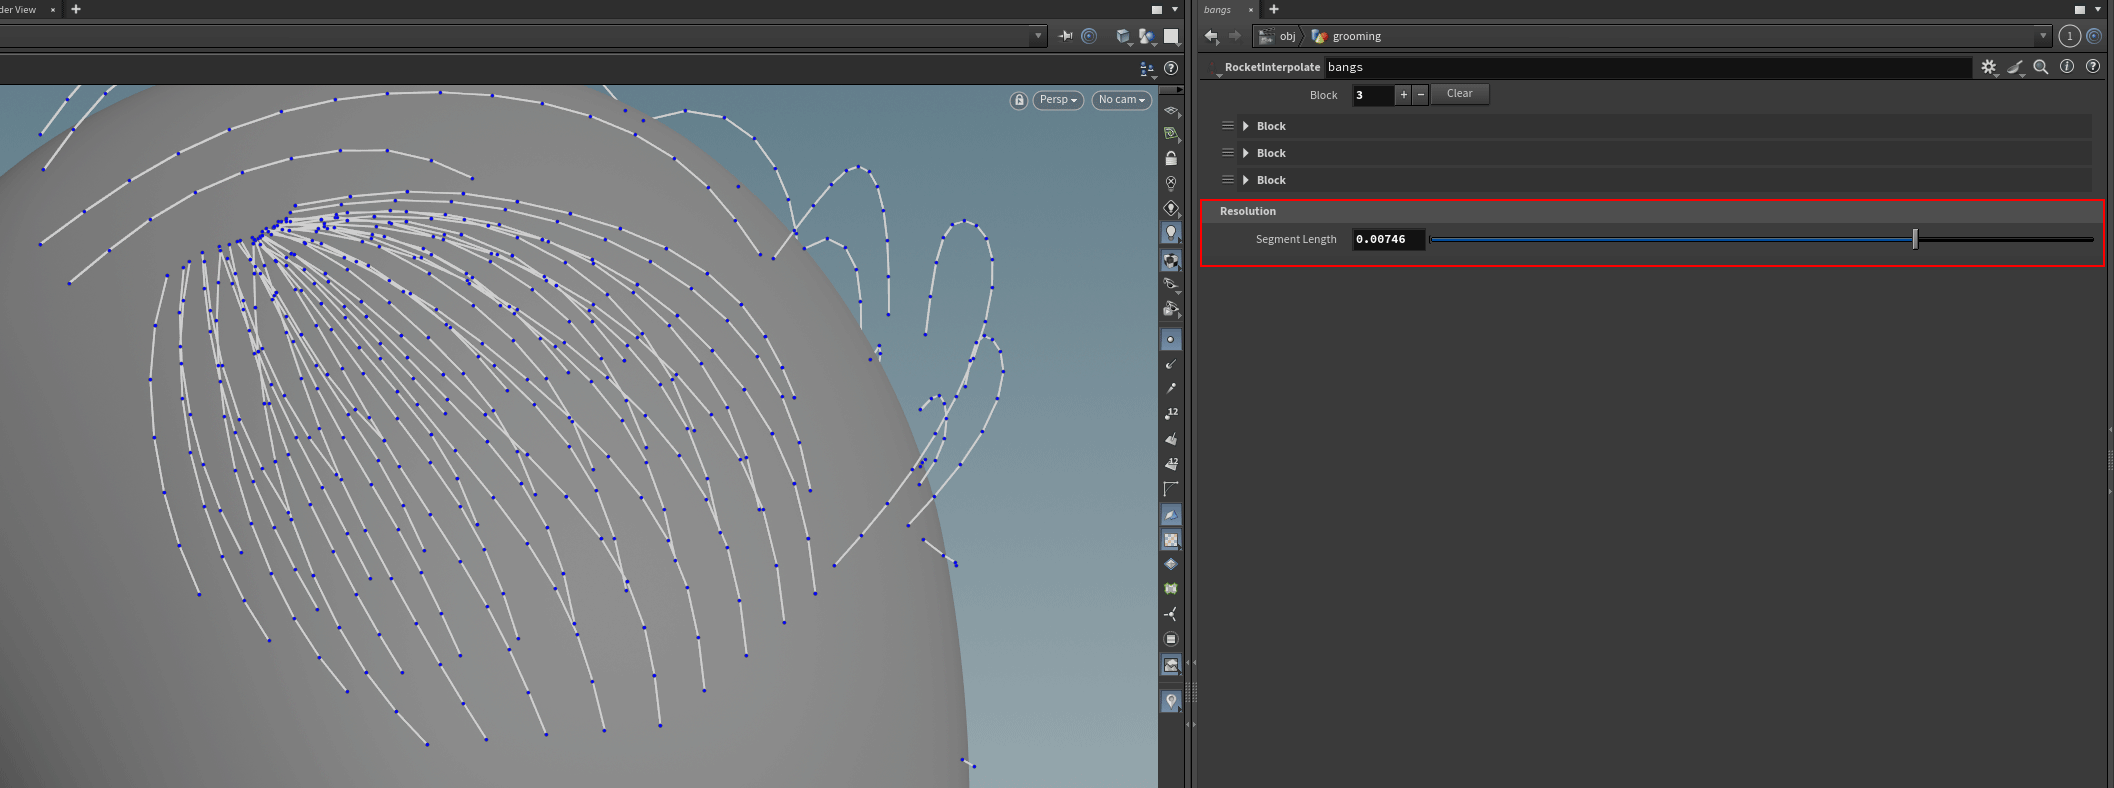
2. Resolution
Here you can change the number of points. Keep this value as low as possible.
Let's dive in.
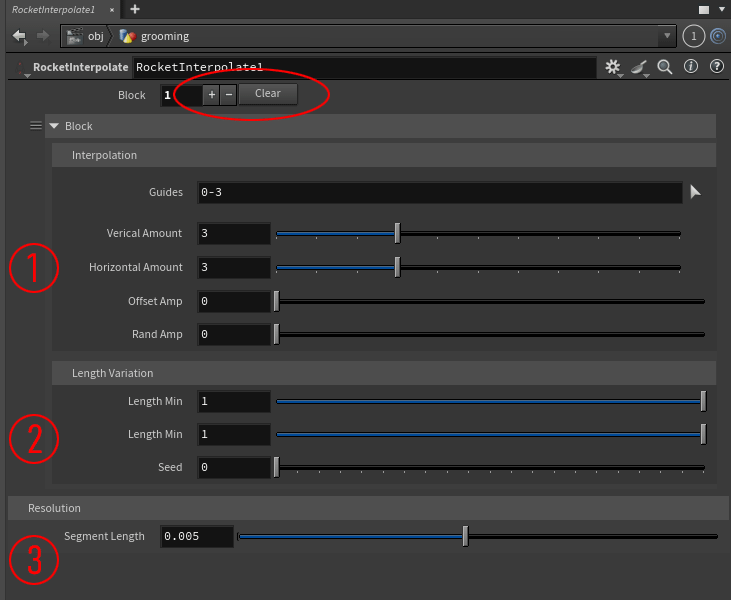
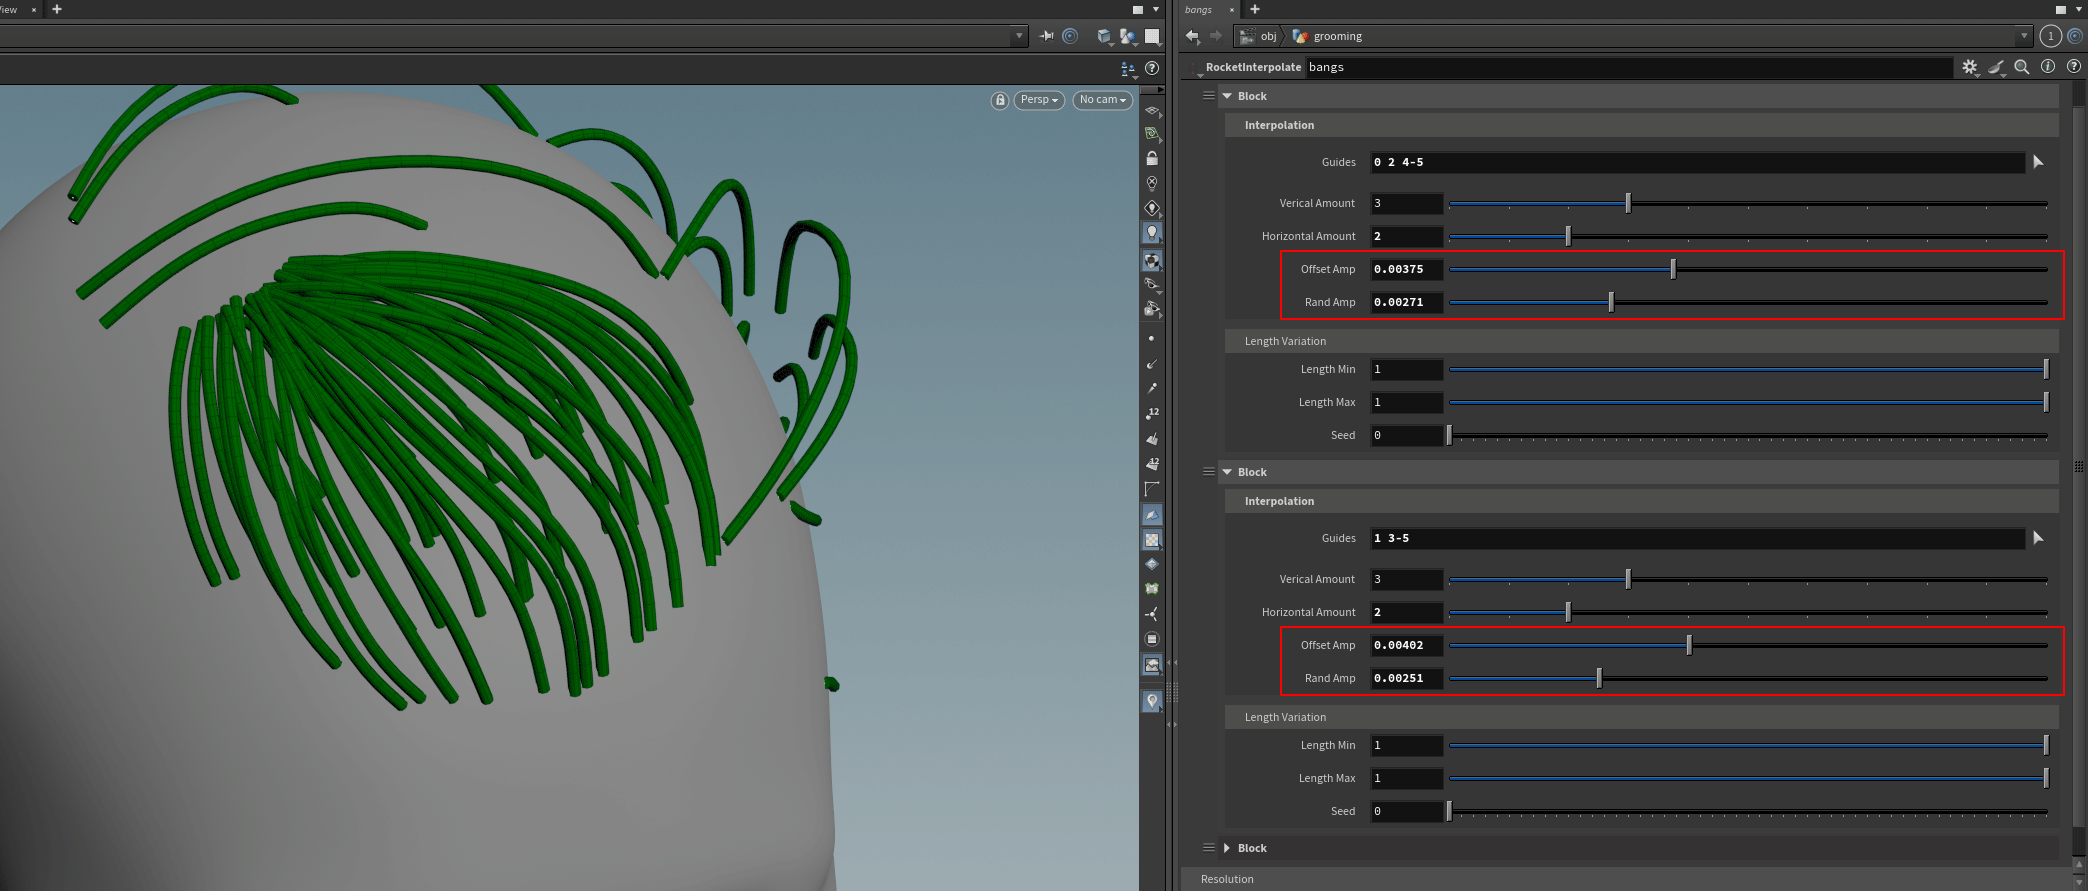
Block
1. Guides
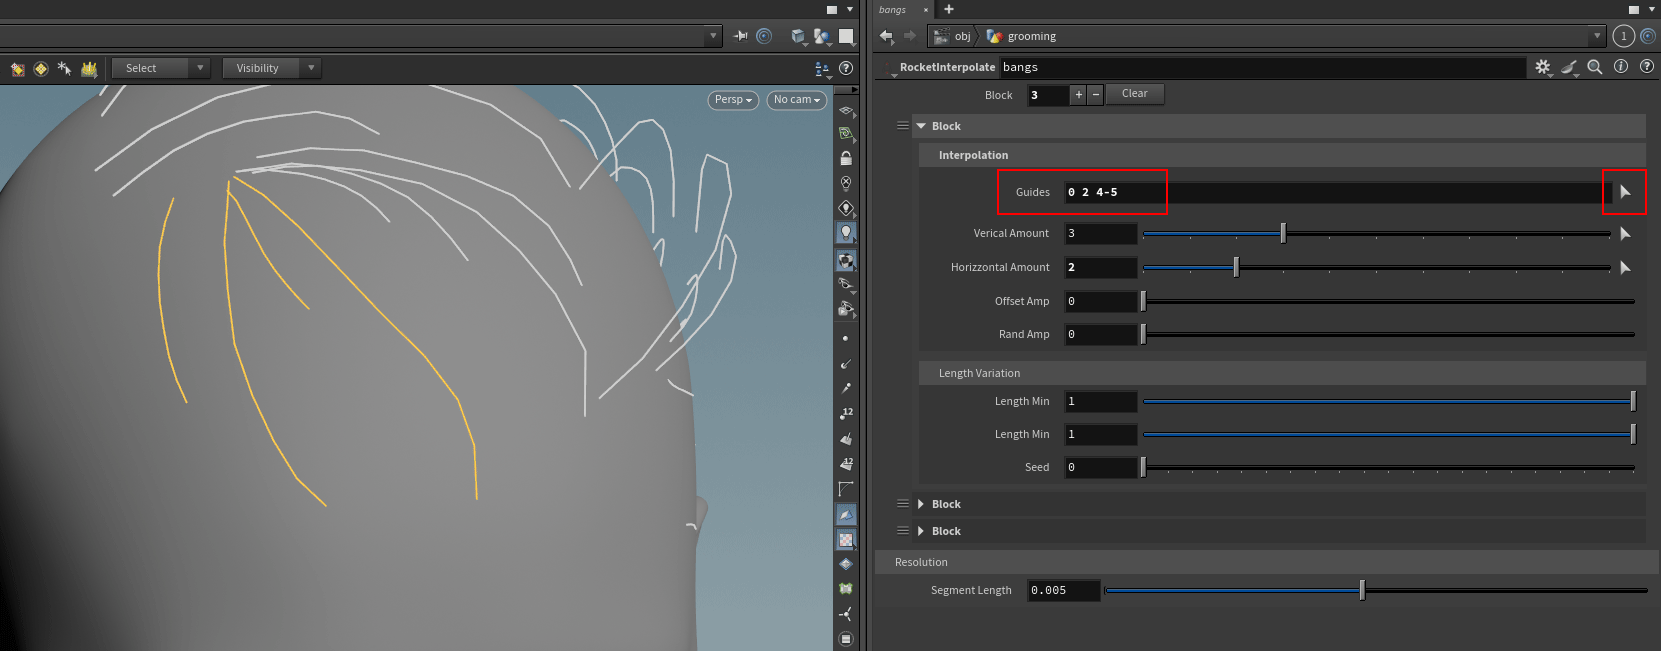
By default, the tool selects the first four guides you created. To change the selection, simply click the arrow and choose the guides you want.
Clicking the arrow also lets you review the selection at any time, which is very helpful when working with many guides and multiple blocks.
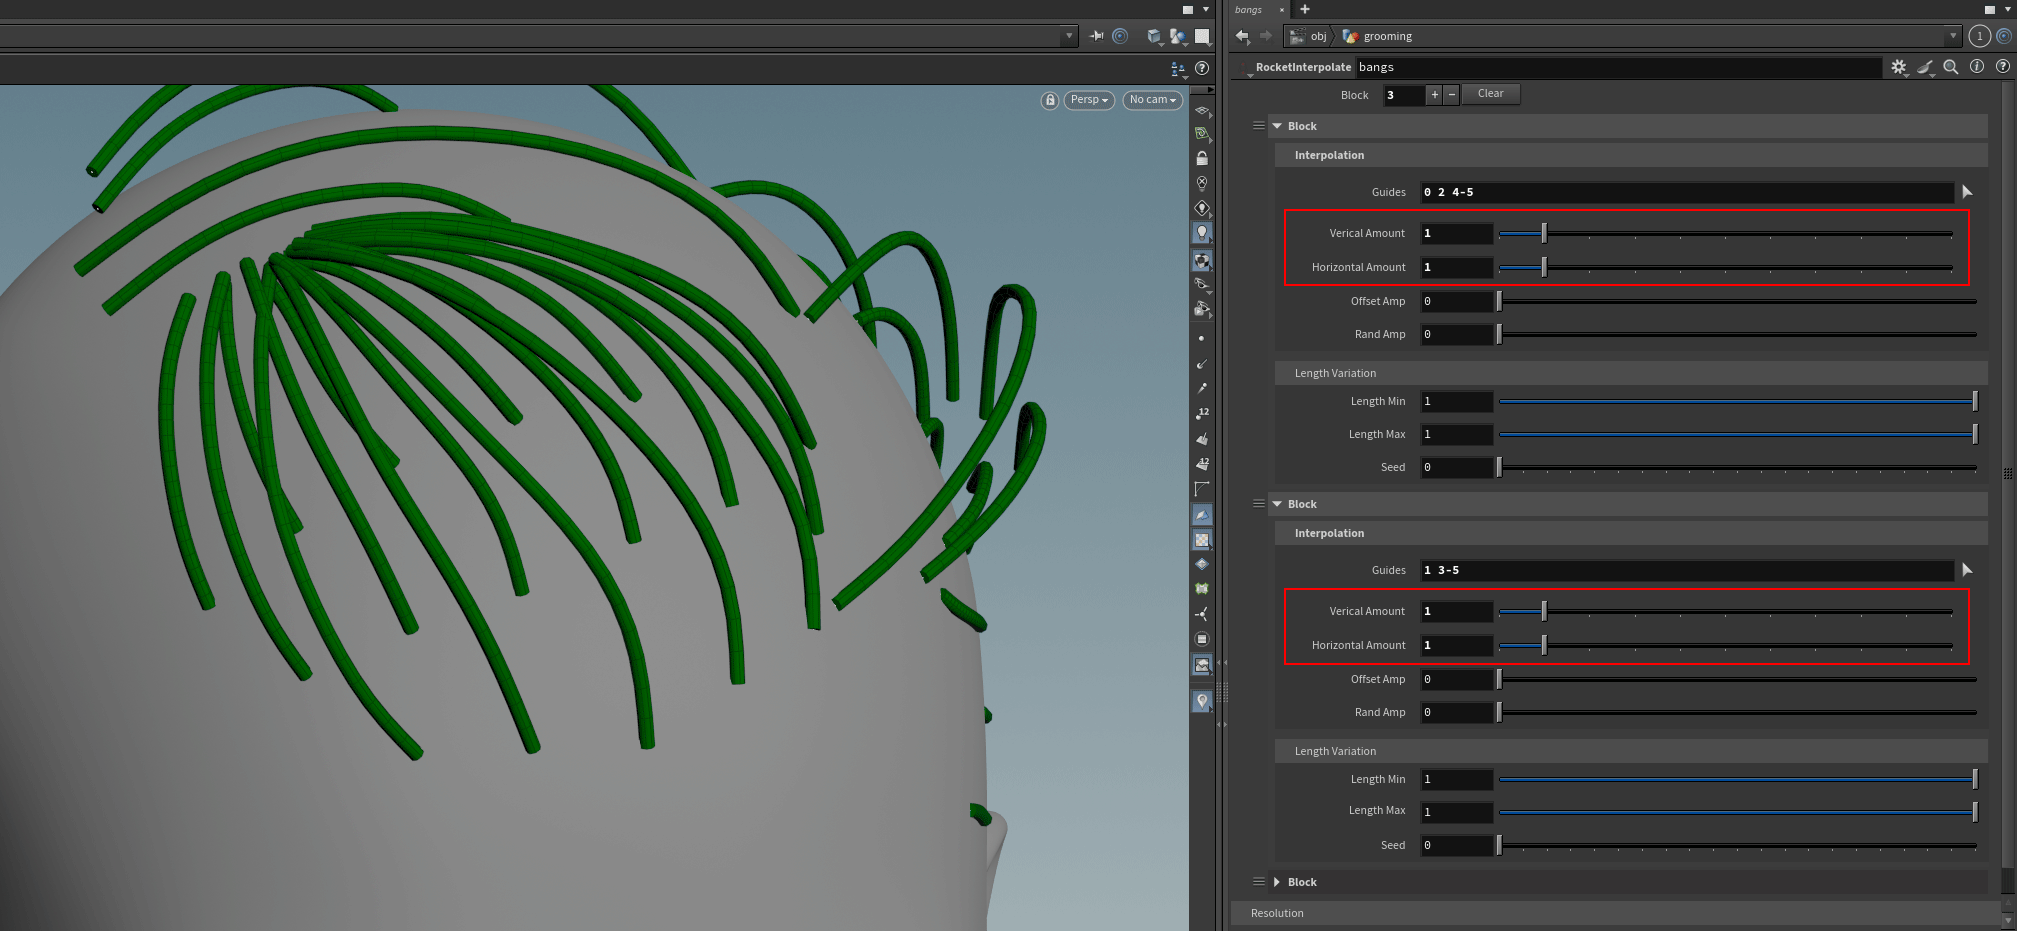
1. Vertical - Horizontal Amount
Here, you can decide how many guides to generate in both directions.
1. Offset - Rand Amp
Use these sliders to add a bit of messiness to your guides.
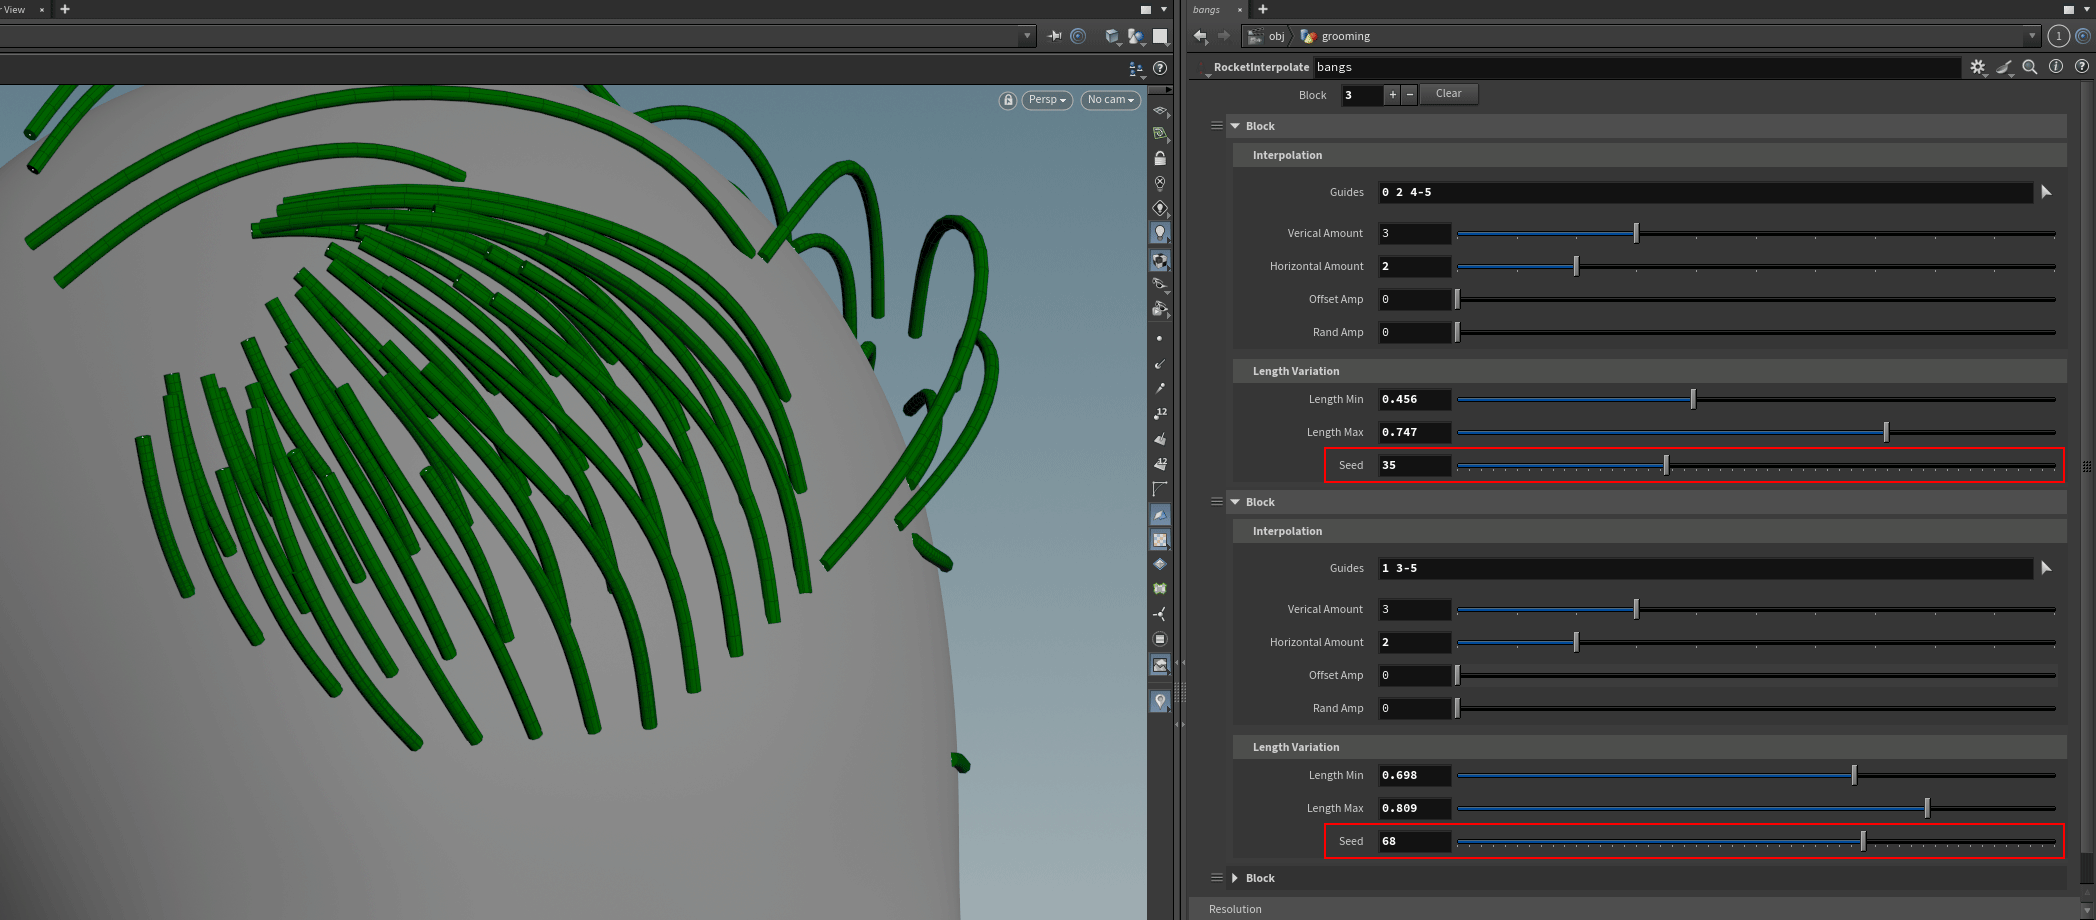
2. Length Variation
Use Length Min and Length Max to add variation to the guides' length.

2. Seed
Use this slider to randomly vary the guides’ length.
3. Resolution
Use the Segment Length slider to control how many points your guides have. Keep this value as low as possible, finding a balance between shape fidelity and point count.
Resolution affects all the guides.
CONCLUSION
That’s all, folks!
I hope you find this tool helpful, and I strongly recommend finishing the work using Rocket Grooming and the other members of the family.
Take care, and share the knowledge with the community.