
After 10 years of shooting, editing and grading I decided that color correction should have been my main job.
During all these years I attended online and in presence courses with pro colorsists to be sure to become a pro myself.
I mainly use DaVinci resolve with a surface control and 10 bit calibrated monitors. I'm based in Italy but used to travel for job.
Ehilà Luca,
questo l'aggiornamento di oggi.
Anzitutto il mirror tool funziona magnificamente e questo ci permette, a costo zero, di avere il doppio delle variazioni (anche se magari non così significative). Non sono riuscito a far funzionare un "button" nell'interfaccia del controller (mi dirai come associare lo scrit da eseguire), per cui ho messo un integer 0/1:
ROCKET CARDS UV

INTRODUCTION
Card grooming was the last major piece missing from my profile. The reason is simple: I’m a hyper-realistic Groom TD, and I’ve never been a fan of the cheap, game-style look often associated with hair cards.
That changed when I first saw the 3DScanStore hair grooms. They’re exceptionally realistic and beautifully crafted.
Around the same time, during one of my recent contracts, I discovered GS Curve Tools and instantly fell in love with how powerful and elegant that tool is.
As a Houdini groomer, though, I wanted to achieve a similar result directly inside SideFX. Not for generating the cards themselves (there are already solid options for that), but specifically for UV placement and control.
After several months of development, this led to two new HDAs: Rocket Card UV and Rocket Card UV Tweak.
Like all my Rocket tools, they’re designed to be simple, intuitive, and artist-friendly.
Let’s dive in.
MENU
VIDEO
For those who want a Rocket rundown of the tool:
INSTALLATION
Unzip the file and put the content of the HDA directory in your otls dir: (../Documents/houdini21.0/otls)
ROCKET CARD UV

When working with hair cards, full control over texturing is essential.
There are several ways to approach this. You can use predefined cards with their own textures, duplicate and place them as needed, or, as I prefer, groom using cards as guides and then, at the final stage, move the UVs to target the exact portion of the texture you want.
Let's see a quick sample:

Under the hood, Rocket Card UV straightens the cards, lays them out, and splits them based on the Group Amount setting.
Notice the difference:
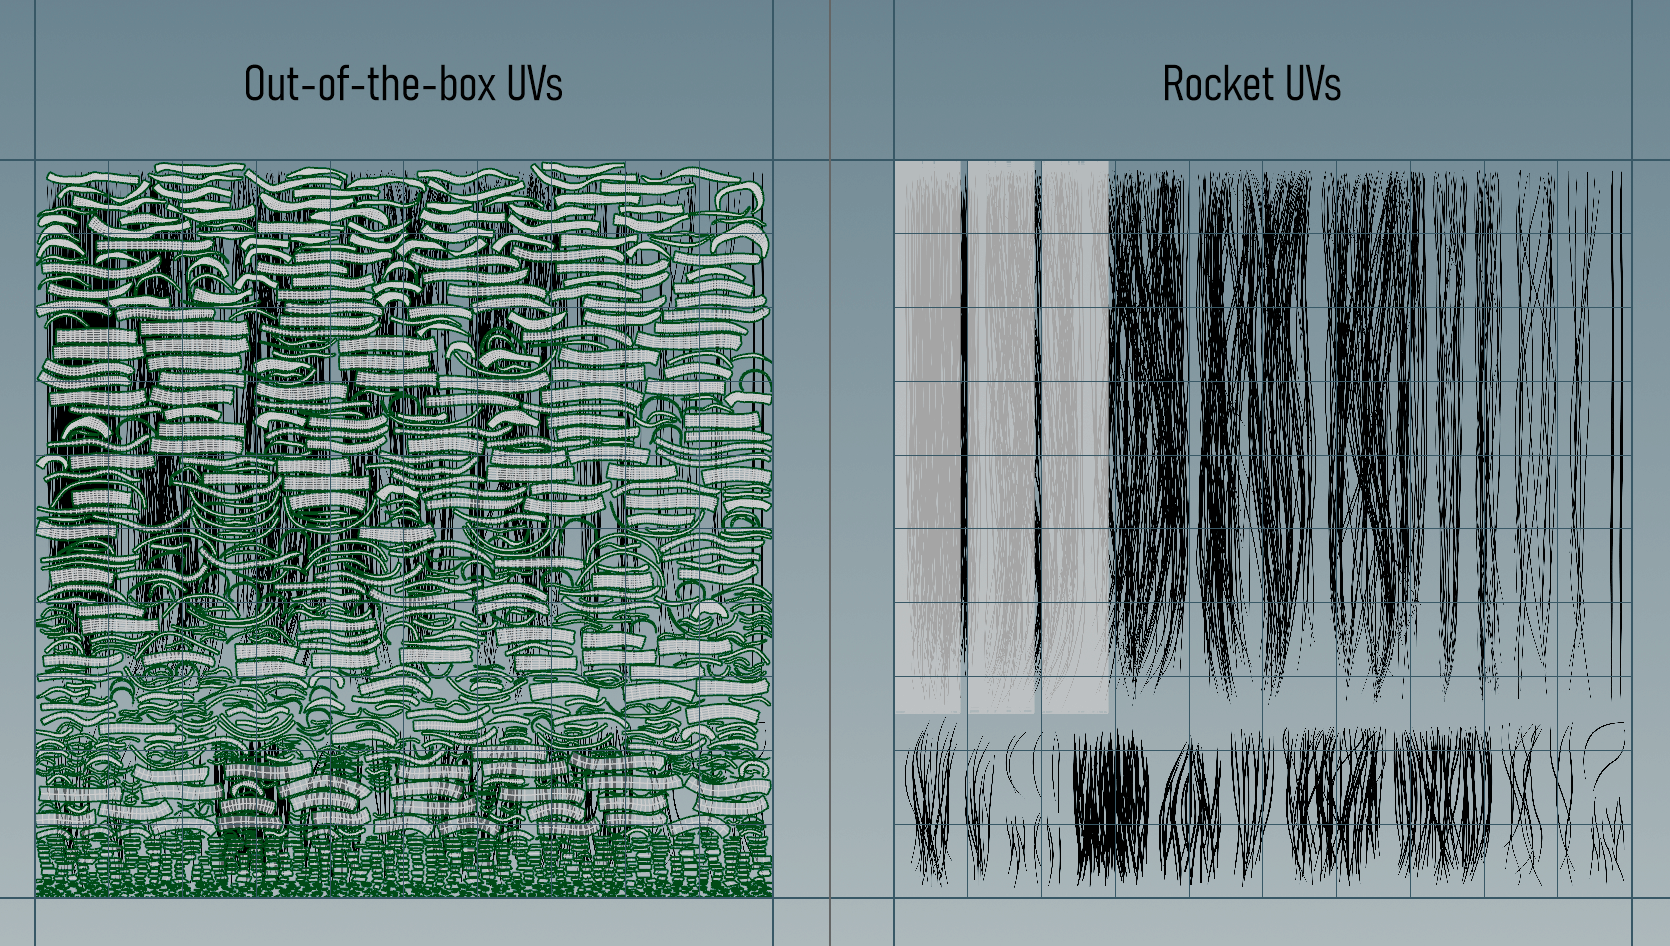
For the left option, I removed the original UVs from the purchased asset and applied a UV Flatten node.
You can split your UVs into as many as 10 groups:
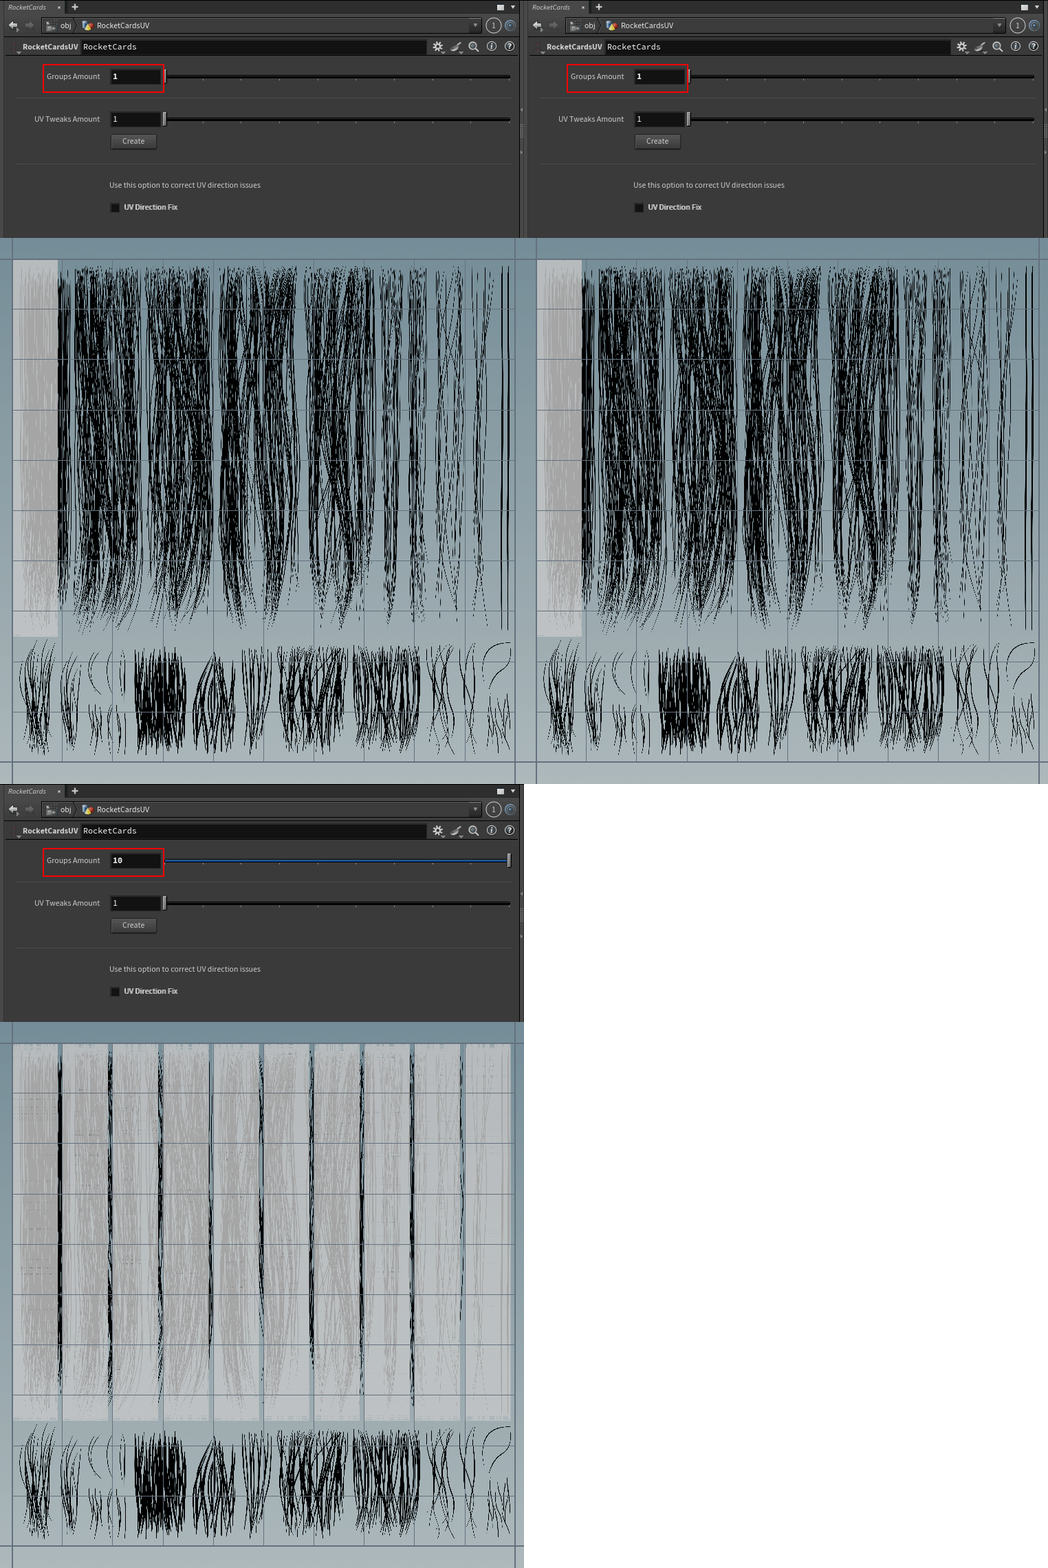
This is a killer feature. By drawing your texture according to this subdivision, you can work extremely fast. With 10 different hair chunks, your character instantly gains all the variation it needs.
But since I’m a picky groomer, I built an additional node dedicated to fine-tuning the UVs. To get this extra level of control, simply click the Create button under the UV Tweak Amount setting:


You can create as many nodes as you like in a single step, or by clicking the button multiple times. In the latter case, each new node is created after the most recent RocketCardsUVTweak node.
Please pay attention to this detail. If your last node is a viewer, such as a QuickUV viewer, the new RocketCardsUVTweak node will not be connected after it:

Let's dive in and look at this HDA.
ROCKET CARDS UV TWEAK

INPUT AND OUTPUTS
To keep things simple and clearly highlight all the features of the tool, I’ll use a very basic set of cards, simulating a small section of a nape:

Since the outputs are key to getting the most out of the tool, let’s start by taking a look at them. Later, I’ll go into more detail on how to position the UVs.
FINAL OUTPUT
Displays the result of the current tool settings.
To preview the result, use a UV Quickshade node with the same texture used in the background.
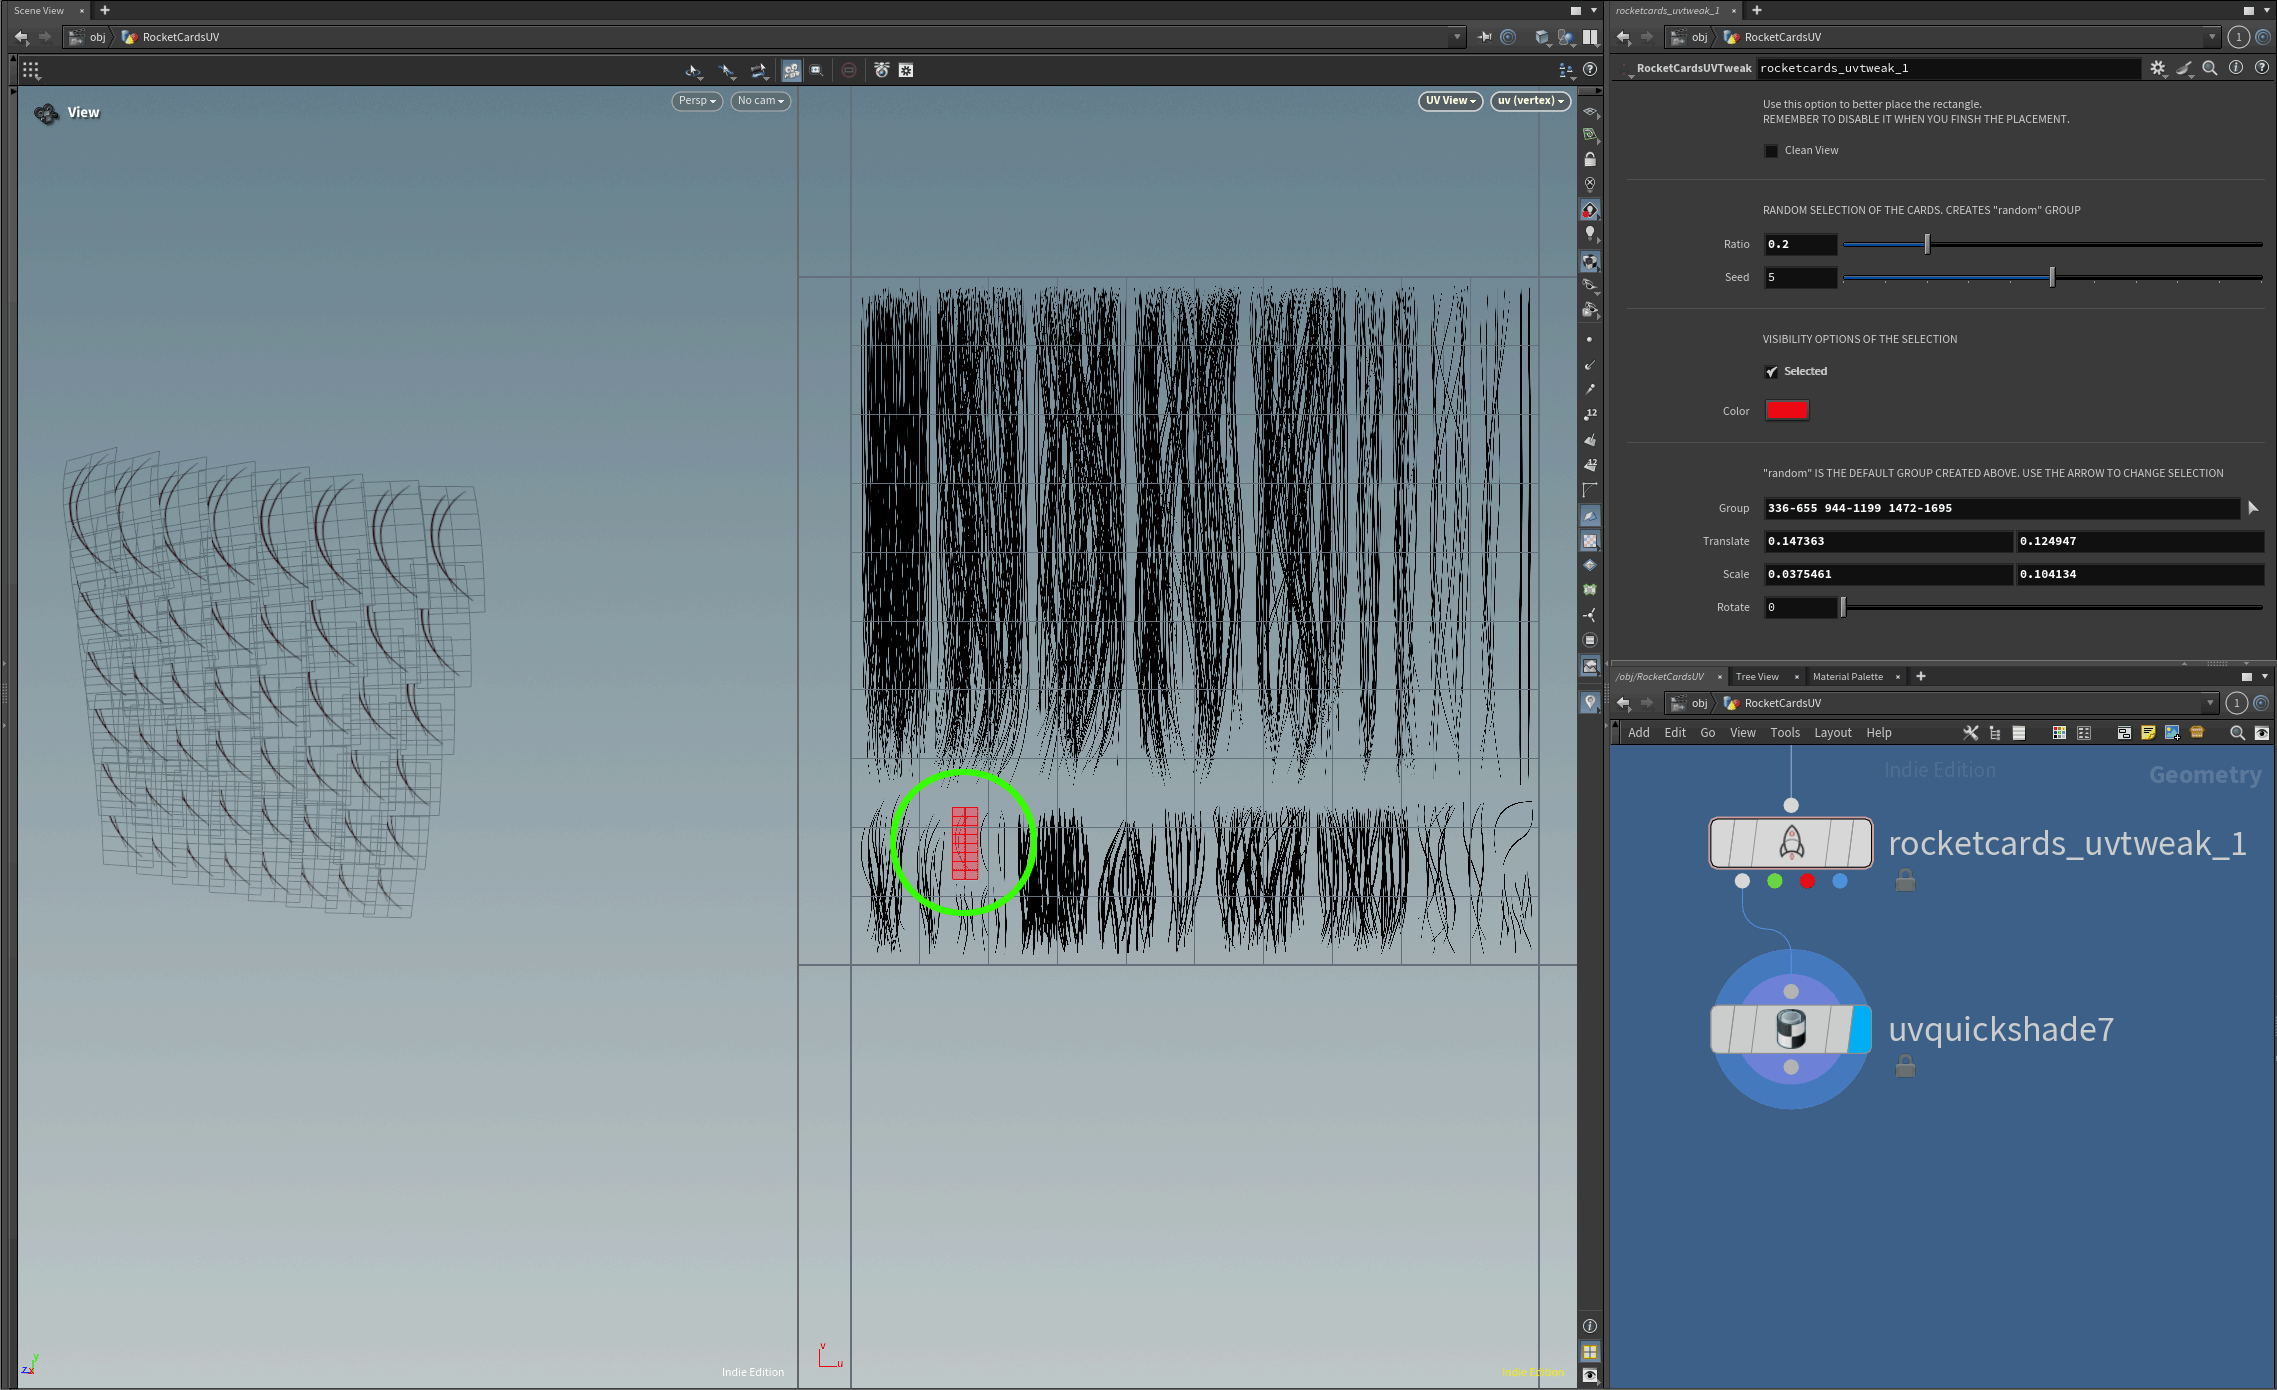
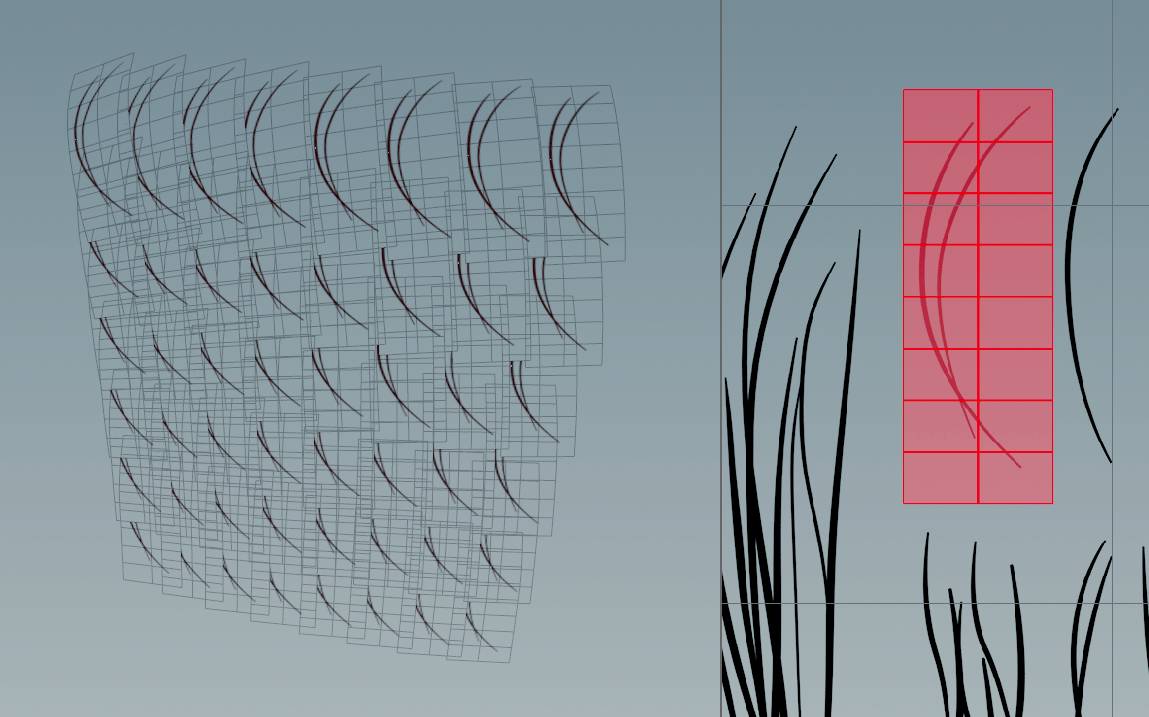
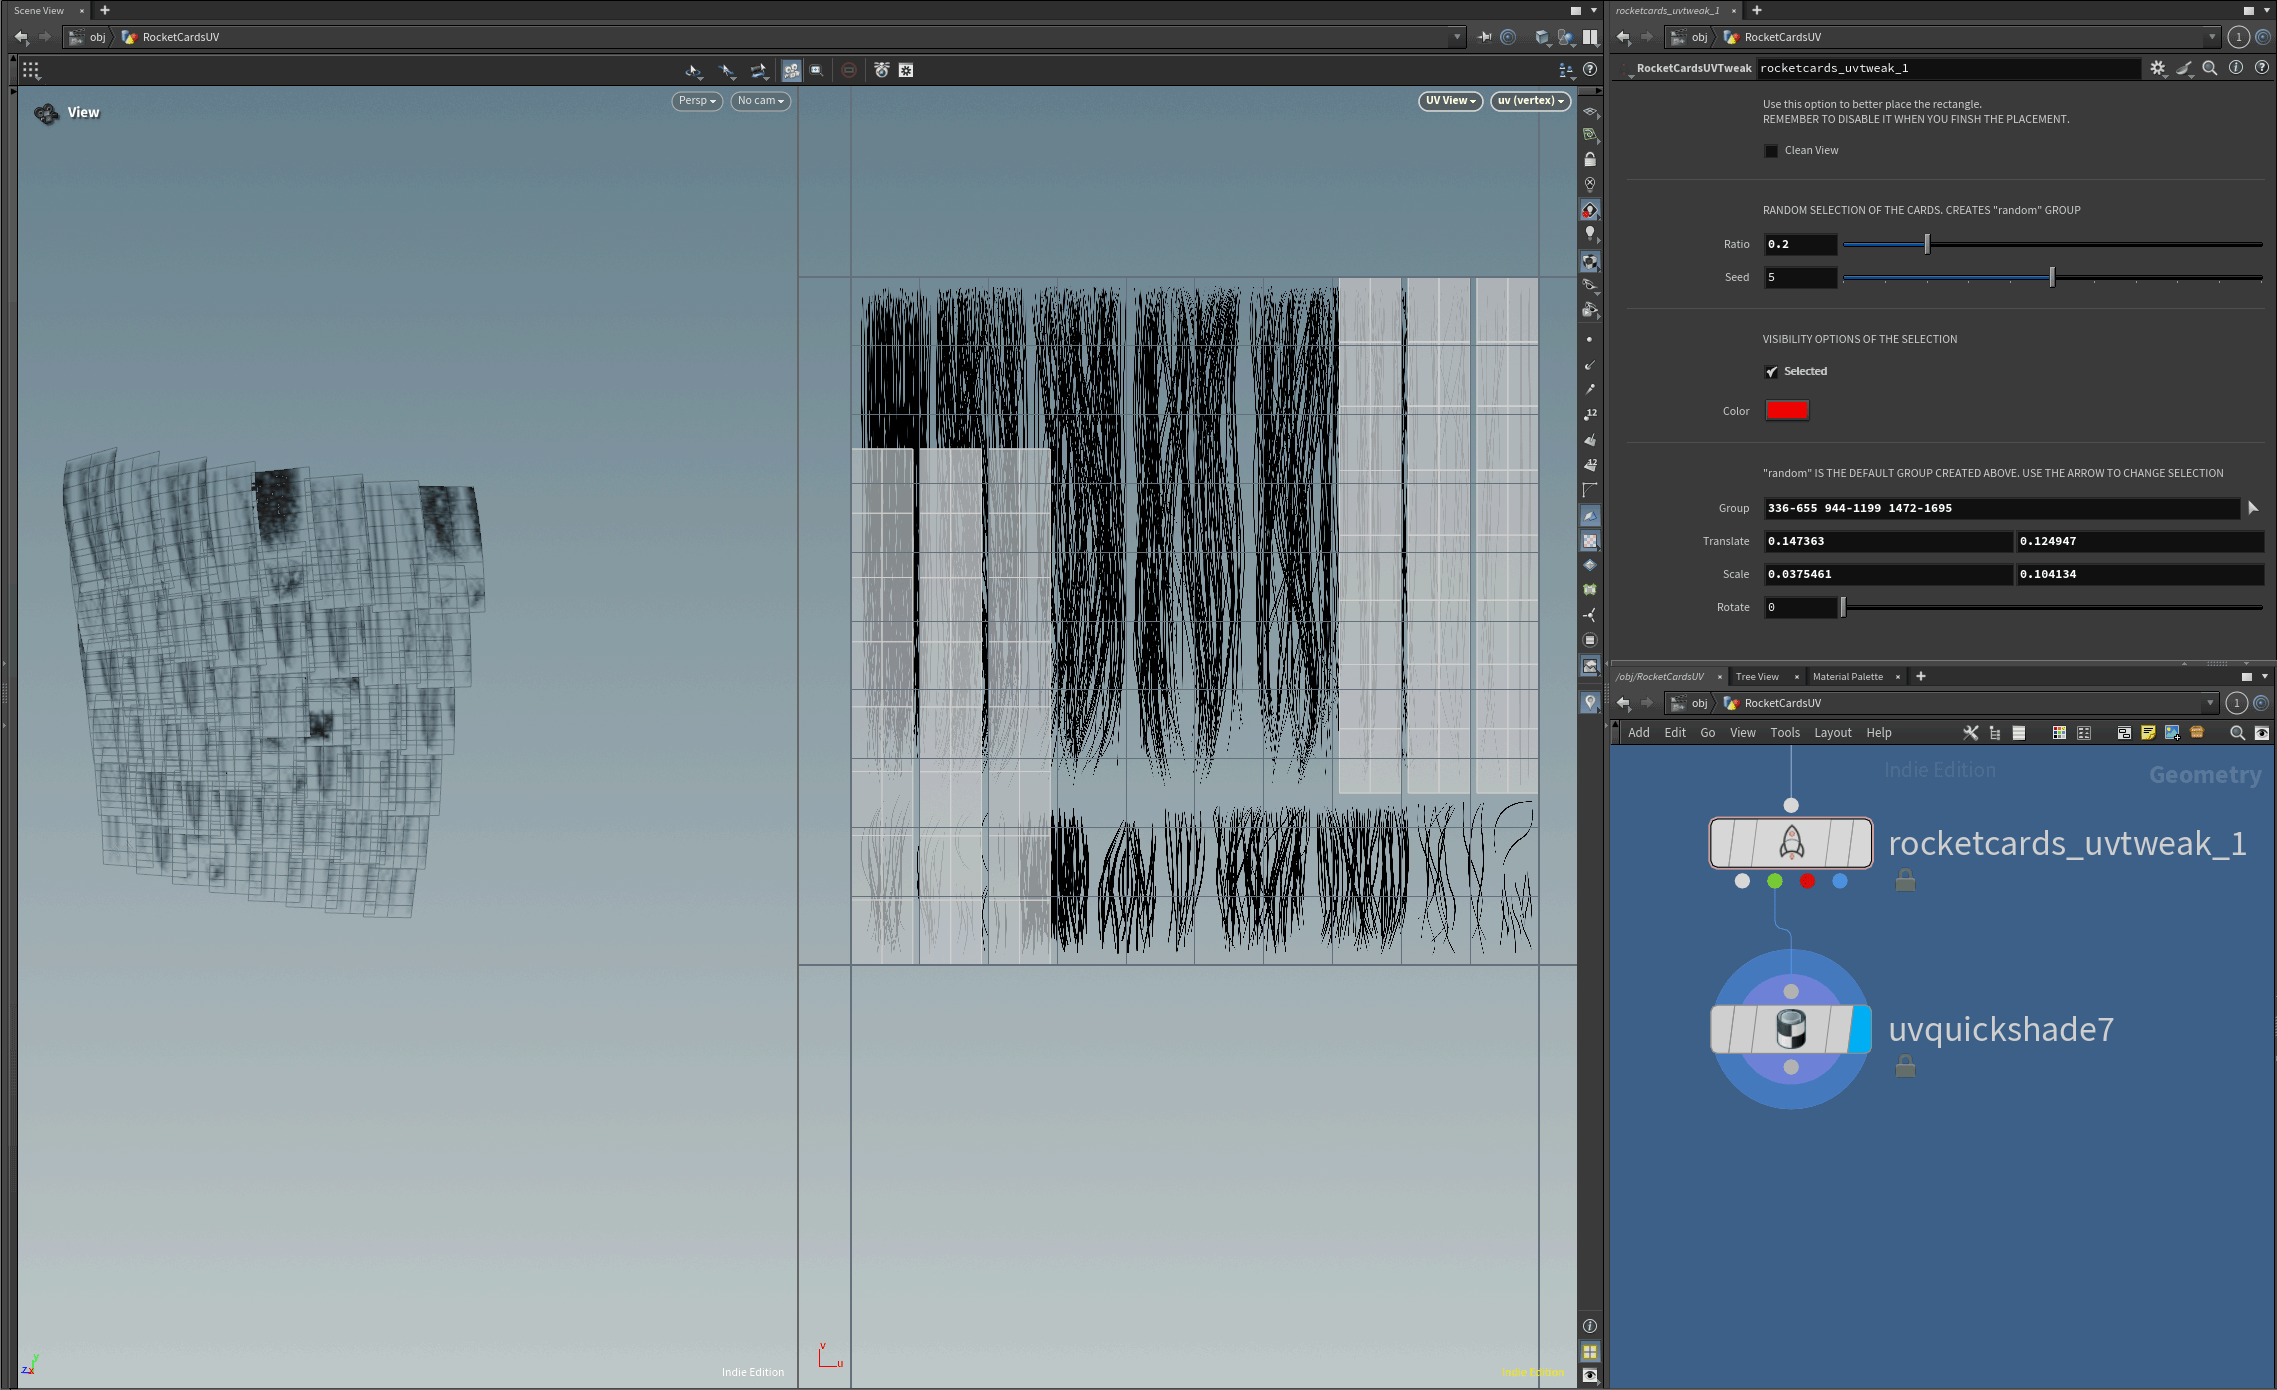
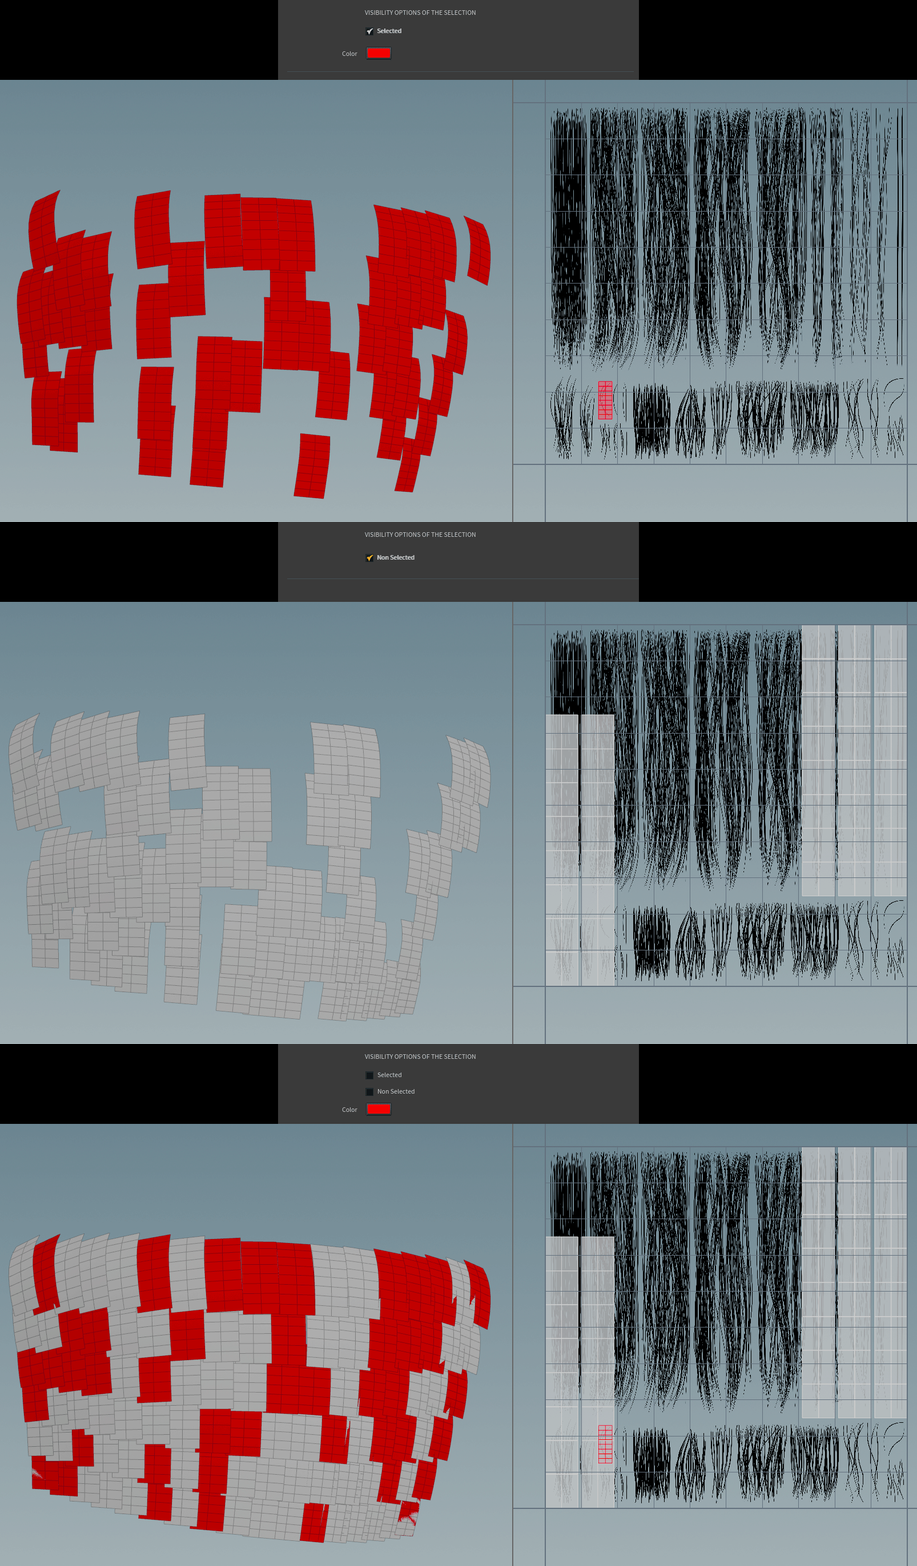
SELECTED
Displays only the selection, whether random or manual, without any unification or layout applied.
NON SELECTED
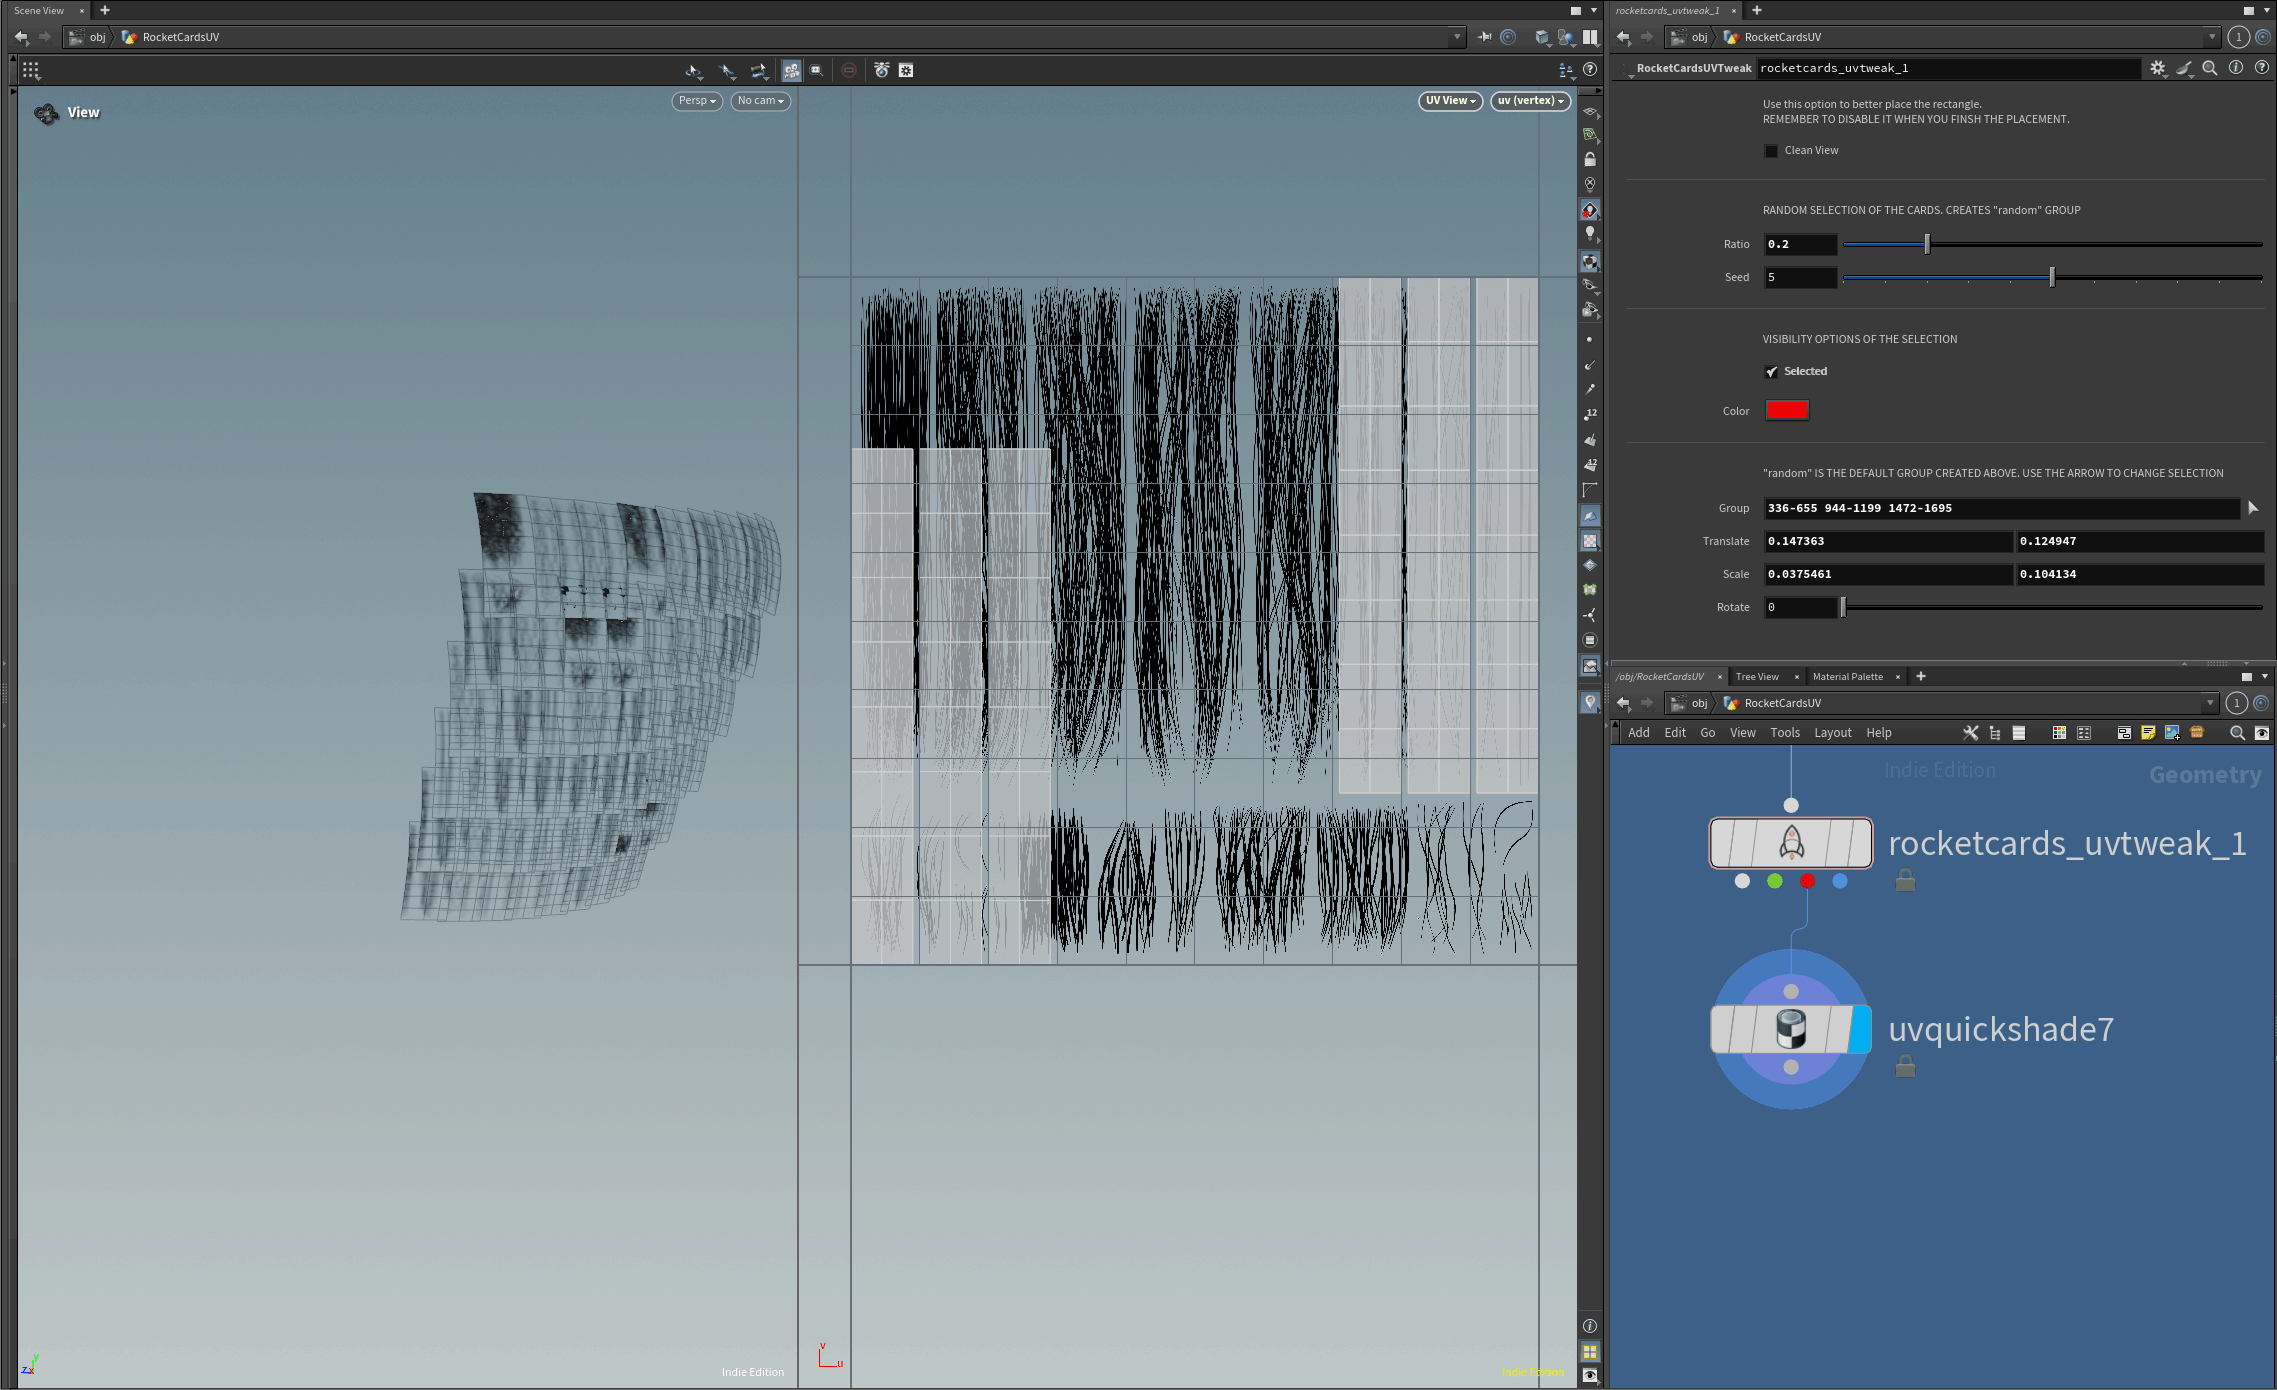
Displays only the non-selected cards, without any unification or layout applied.
This output is crucial because, by connecting a new Rocket UV Tweak node to it, you can work exclusively on the portion of the groom that hasn’t been tweaked yet.
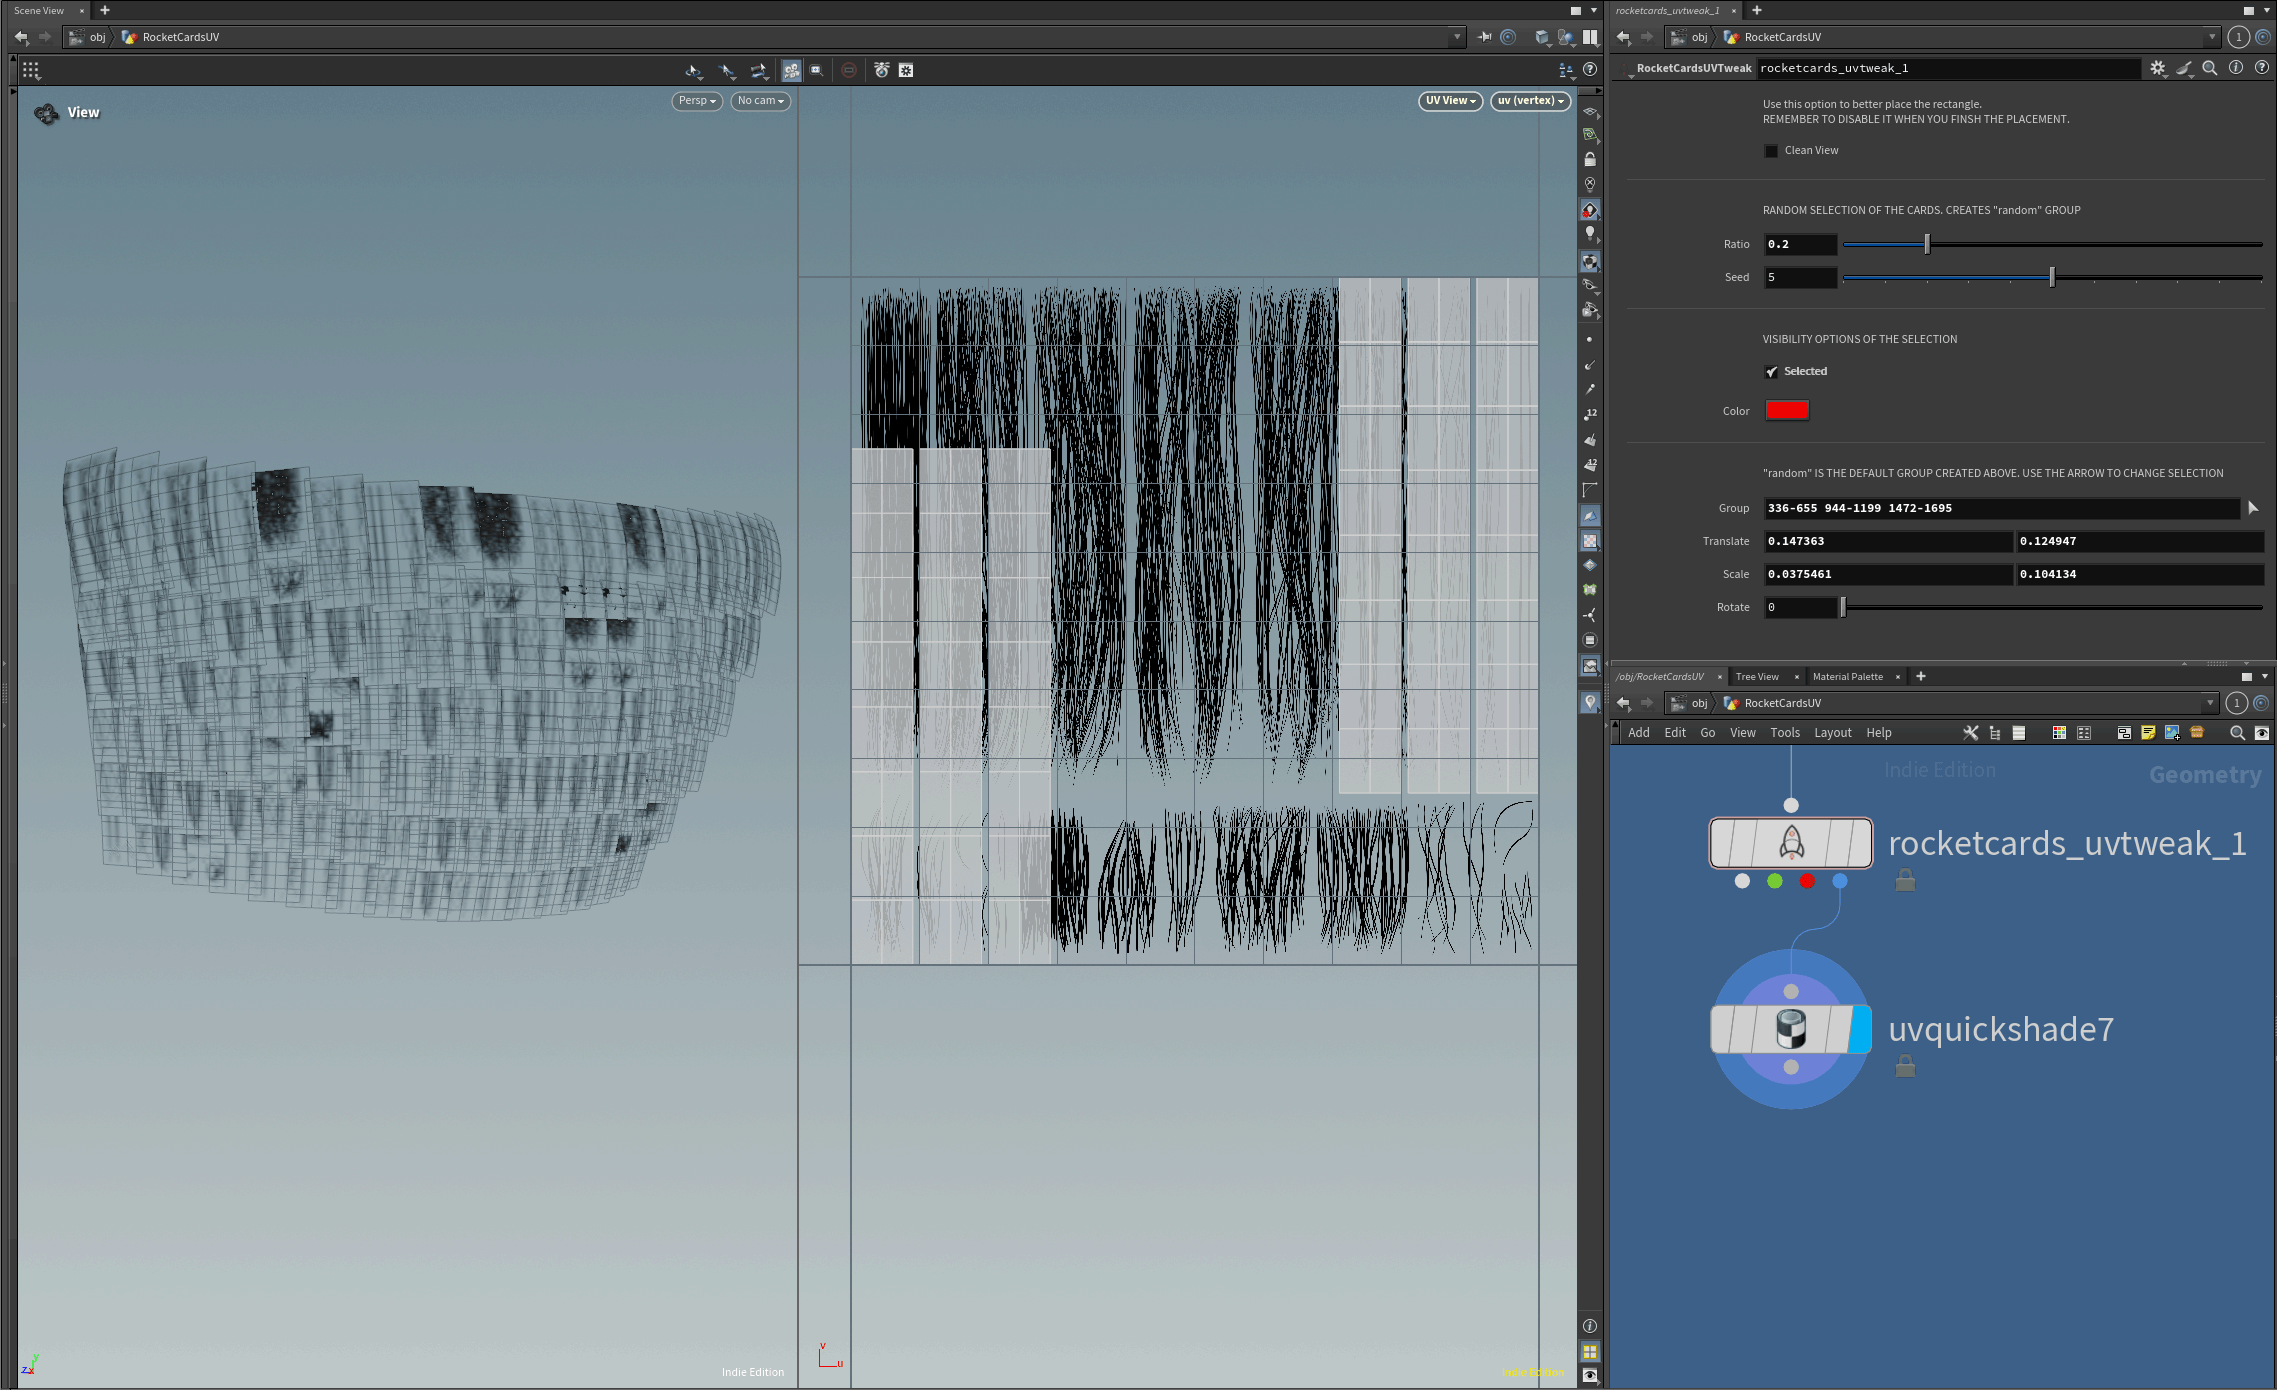
SELECTED + NON SELECTED
Displays all the cards, without any unification or layout applied.
SETTINGS
Let's dive into the tool.
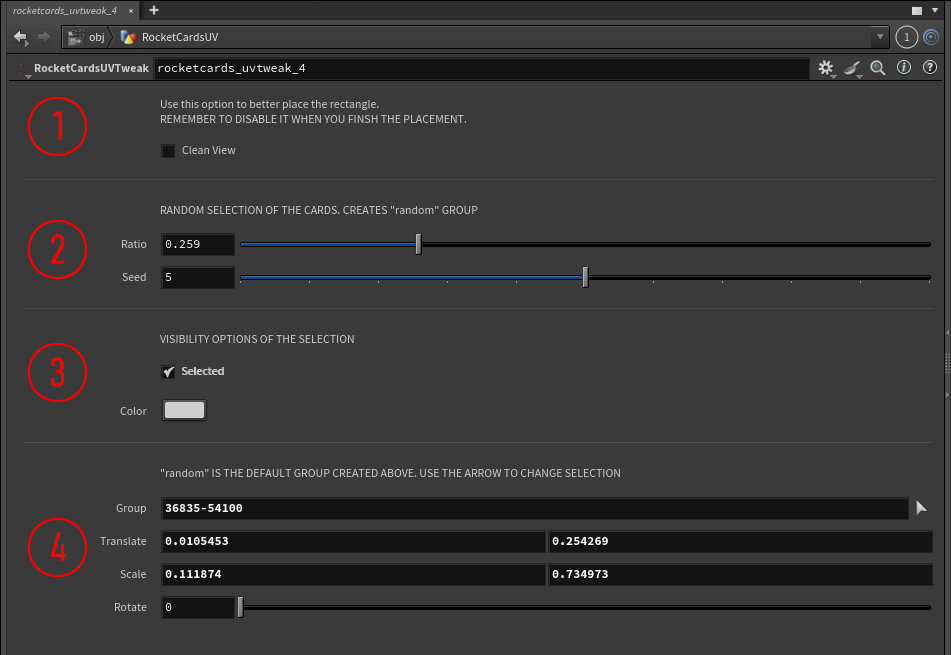
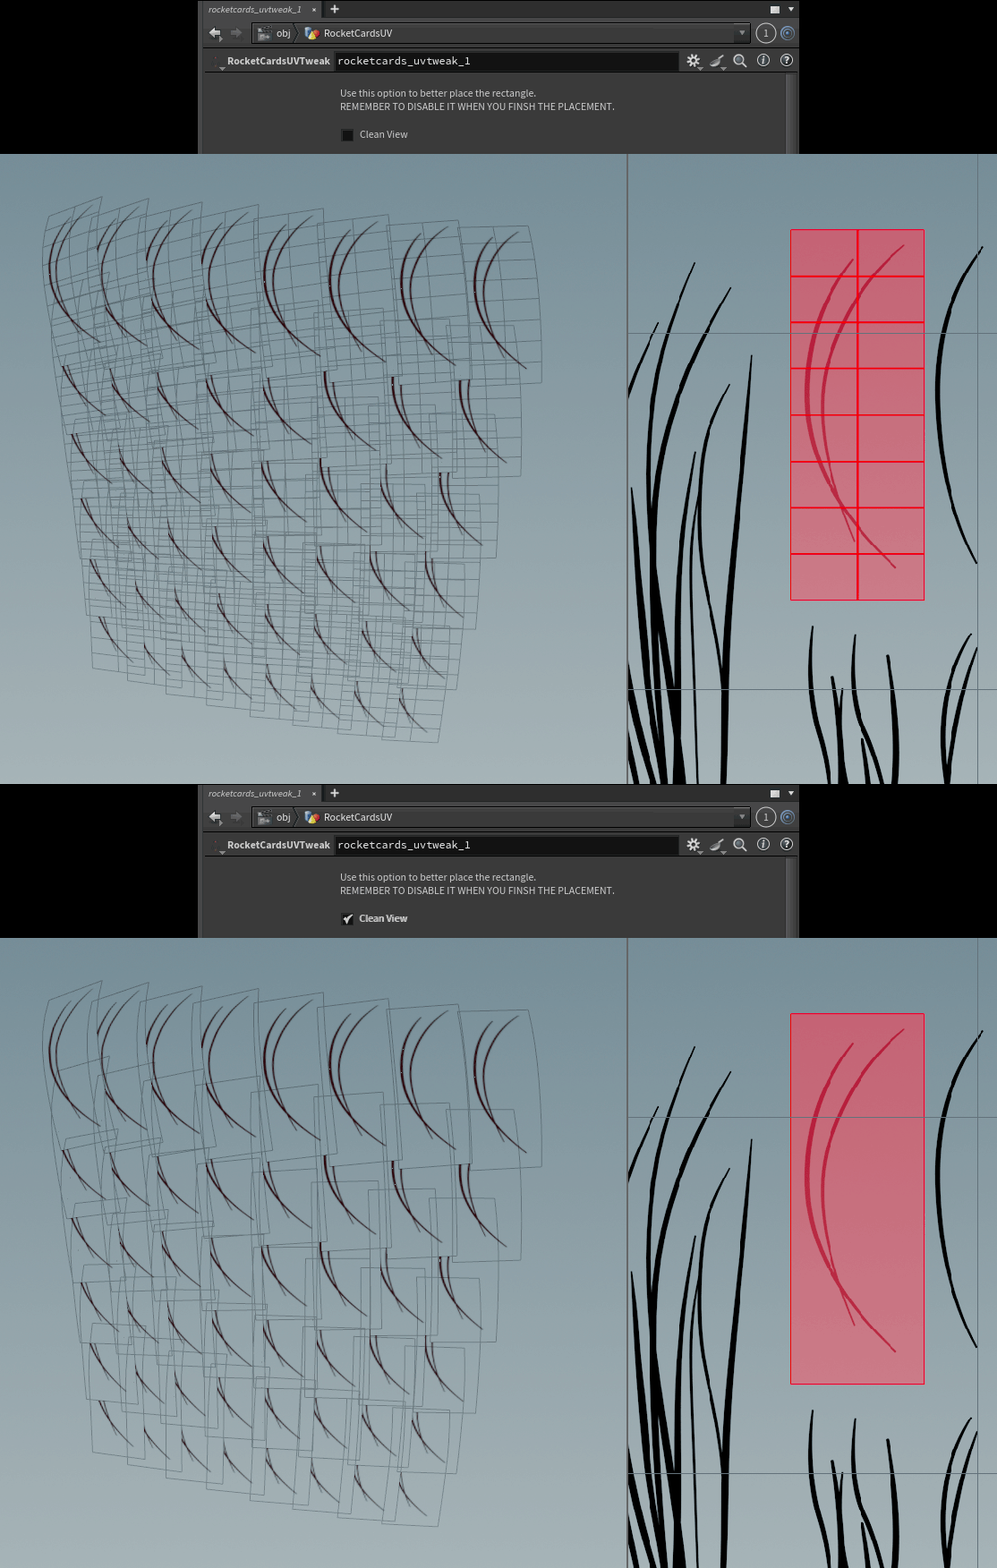
1 - CLEAN VIEW
I’m extremely picky when it comes to visualization, and since overlapping cards can quickly become a visual mess, I use a small trick: I delete all internal polygons so that only the card boundaries are displayed.
It’s not worth going into too much detail here. The only important thing to remember, as the warning indicates, is to disable this option once you’re done with the placement.
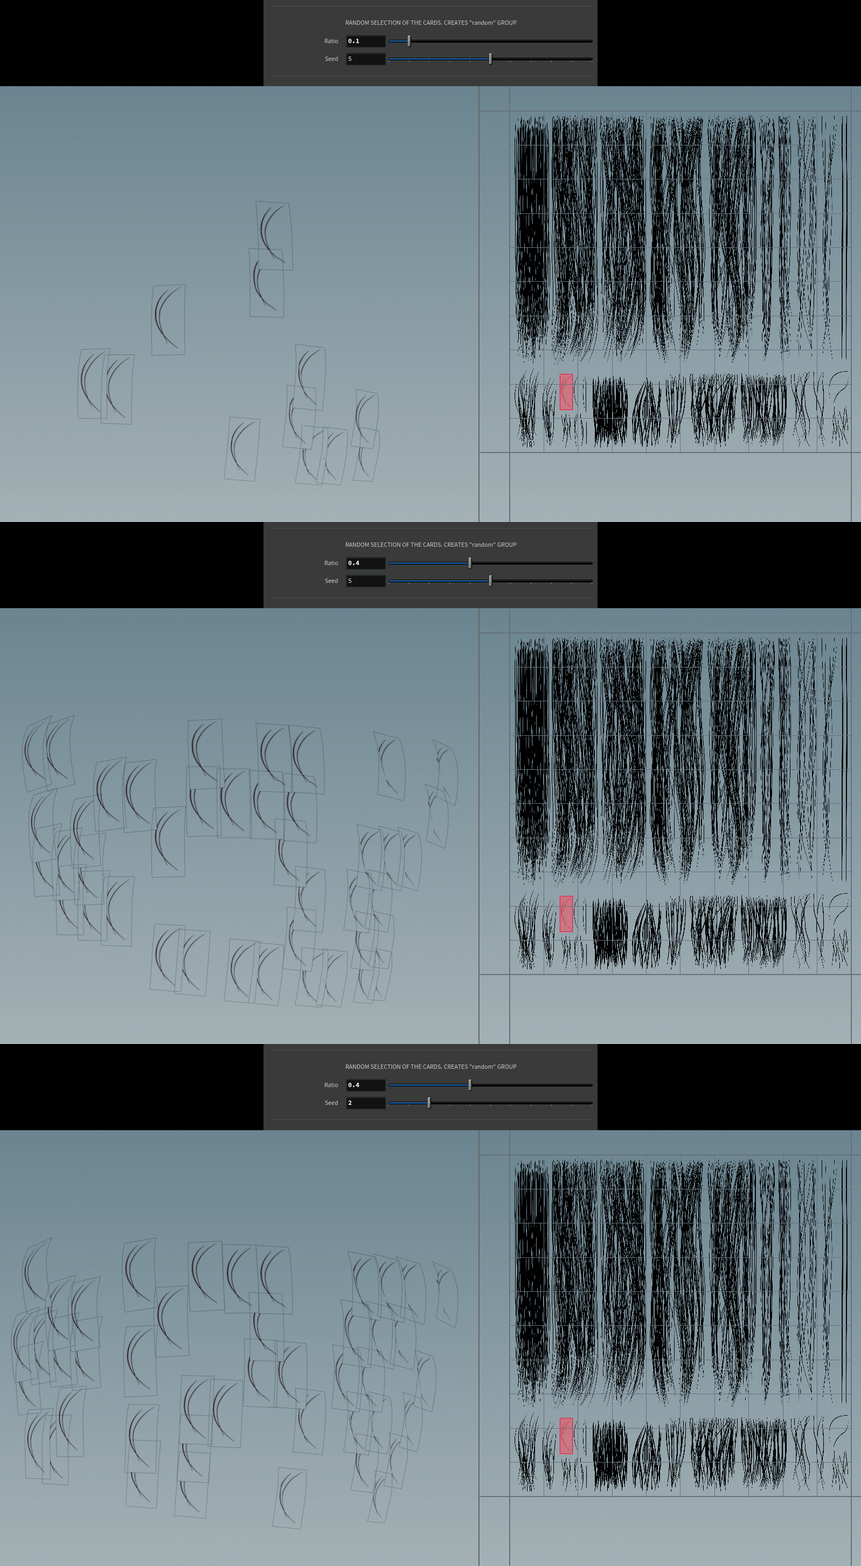
2 - RANDOM SELECTION
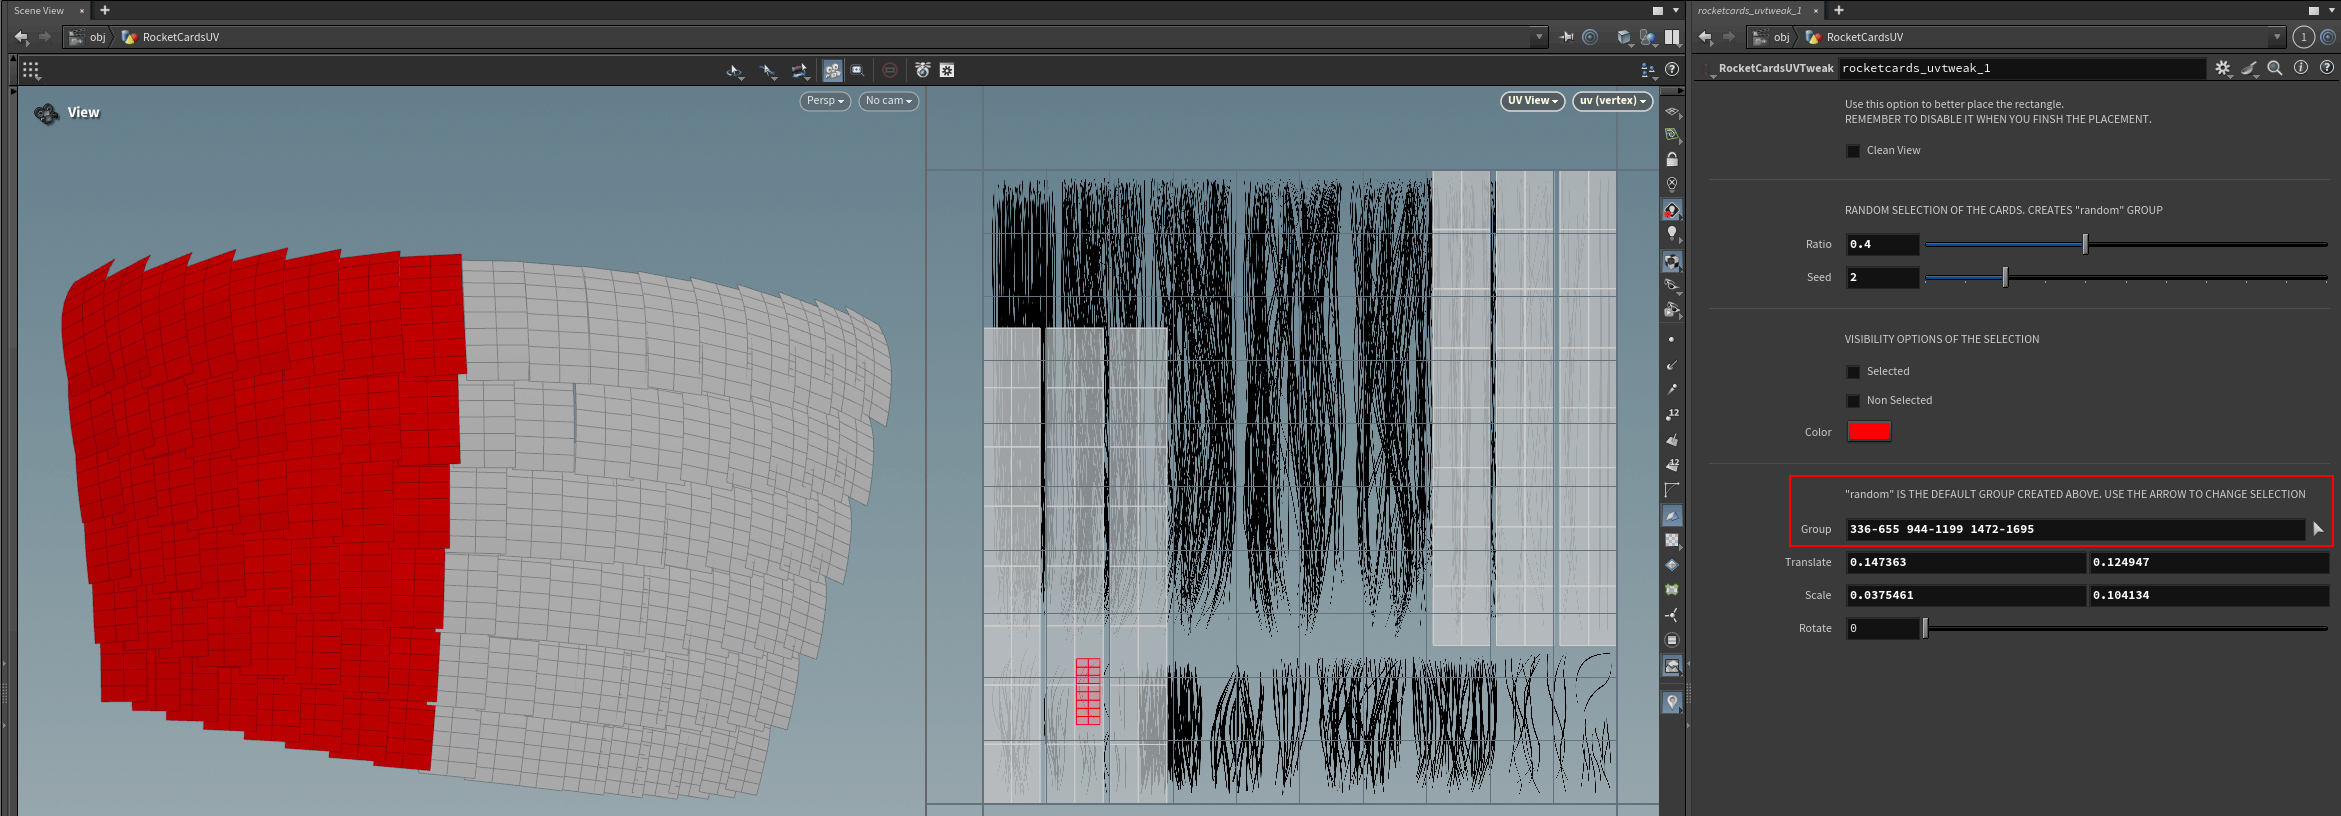
To quickly introduce variation in the UV distribution, you can use these two sliders to randomly select the cards.
A group named "random" is created:
3 - VISIBILITY OPTIONS
Use the toggles to display the selected cards, the unselected ones, or both. You can also choose a specific color for the selection:
To display the cards, enable the blue display toggle on the node.
4 - MANUAL SELECTION
By default, the selection uses the random group created earlier. If you need a specific selection, click the arrow and manually pick the cards.
Tip
To make sure you select all the polygons of a card, press Shift + G repeatedly before confirming the selection.
If you want to switch back to the random group, simply type random in the group field.
TRANSFORM FIELDS
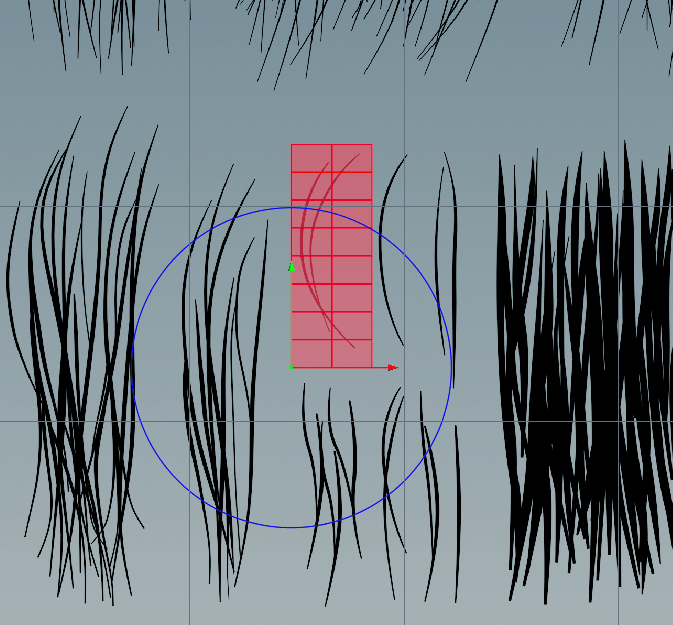
To position and resize your cards, you can use the Transform, Scale, and Rotate fields. Even better, once the selection is done, press Enter to activate the gizmo and work interactively.
CONCLUSIONS
Card grooming can be approached in different ways. Use or build the method that best fits your needs and workflow.
Rocket Cards UV focuses mainly on the UV stage. In Houdini, the tools to generate the geometry are already there, but getting clean, straight, and well-assigned UVs can be the real challenge.
Once again, my tools are simply optimizations of my existing networks, ways to experiment and discover new combinations of the tools we already have, with a bit of VEX.
Enjoy, and share the knowledge!